Manage user roles (administrator)
Jump to section
As an administrator, you can manage Möbius user roles through the Role Manager.
After accessing the Role Manager, you can perform the following tasks:
- Create custom user roles
- Clone existing user roles
- Edit existing user roles
- Delete existing user roles
NOTE: Any user role that exists in your Role Manager is available to other users within your organization. Example — If you create a new custom user role, this user role is available to be selected during user searches and user creation.
Each user in Möbius is assigned a system role.
System role — A user role that's assigned at the time of account creation and determines what privileges the user has in Möbius.
NOTE: If a user creates their own Möbius account using self-registration, their system role defaults to a student role.
A user will be assigned a class role once they're enrolled into a class.
Class role — A user role that's assigned when a user enrolls into a class and only applies to the specific class that they've enrolled in.
NOTE: A user's system role determines their privileges throughout Möbius unless they enroll in a specific class with a different class role. Example — A user with a system role of instructor will also have a class role of instructor in all of their assigned classes. If that user were to enroll in another class as a student, they would then have a class role of student in that specific class with only student privileges, but maintain their instructor privileges outside of that class.
Default user role — A user role that's ready-to-use with predefined details and privileges that comes preloaded in Möbius.
The available default user roles (in order of descending privileges) are:
- Administrator
- Instructor + create
- Instructor
- Proctor
- Student
- Guest
NOTE: Your organization could have additional custom user roles that are available. Administrators can create custom user roles.
NOTE: Even if a user has the privilege required to create a user, they can only create a user of equal or lesser privileges than their profile. Example — An instructor + create user can't create a user with an administrator role.
User roles are grouped into three categories based on different levels of available privileges (in order of descending privileges) within the Role Manager:
- Administrator Roles — User roles in this category generally have full-access privileges within their organization. Example — Administrator role
- Class Roles — User roles in this category generally have most privileges within a class but limited organization-wide access privileges. Example — Instructor and instructor + create roles
- Student Roles — User roles in this category are limited to interaction with class content, management of their own user profile, and viewing of their own Gradebook. Example — Student and guest roles
Access the Role Manager
To access the Role Manager:
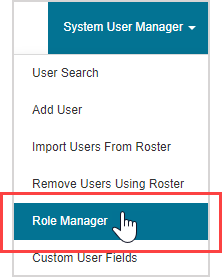
Click System User Manager on the System Homepage.

Click Role Manager.

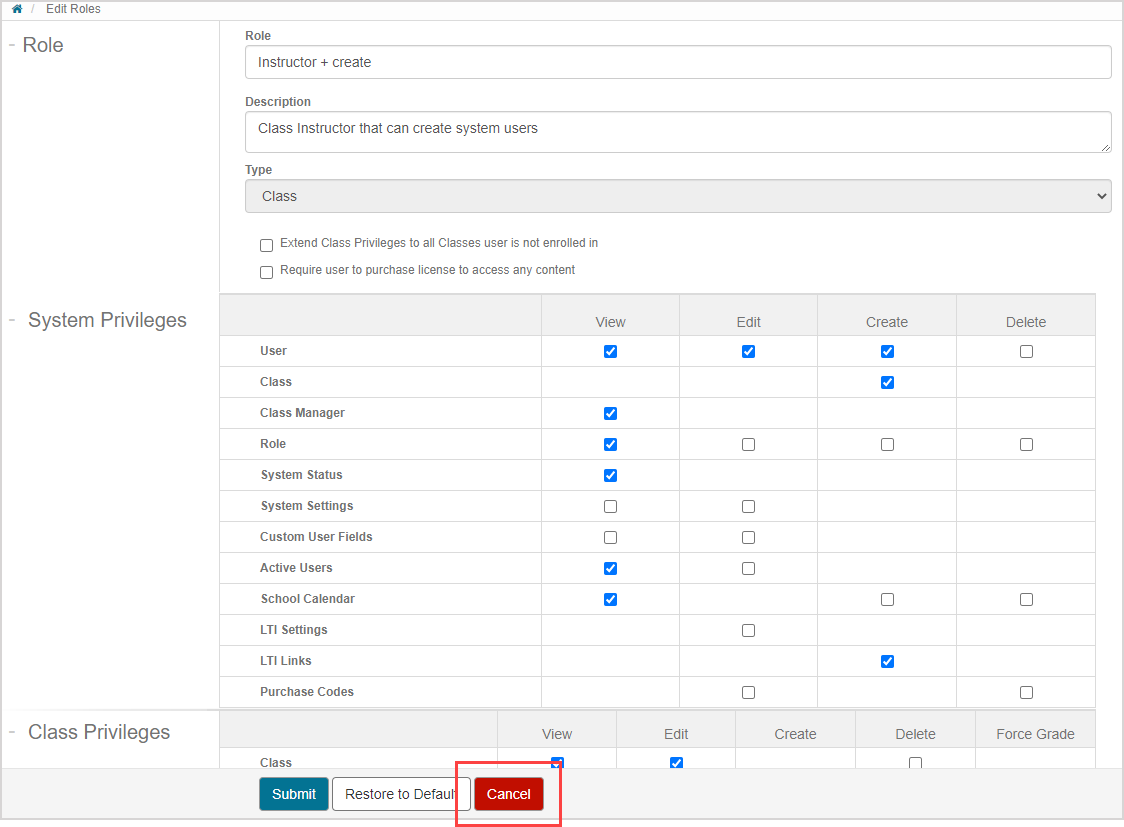
The default and custom roles for your organization are displayed on the Role Manager's main page. Click on a role name from the Role Manager to view the details and privileges for the selected role.

Review the details and privileges for the selected role. Click Cancel to return to the Role Manager's main page.

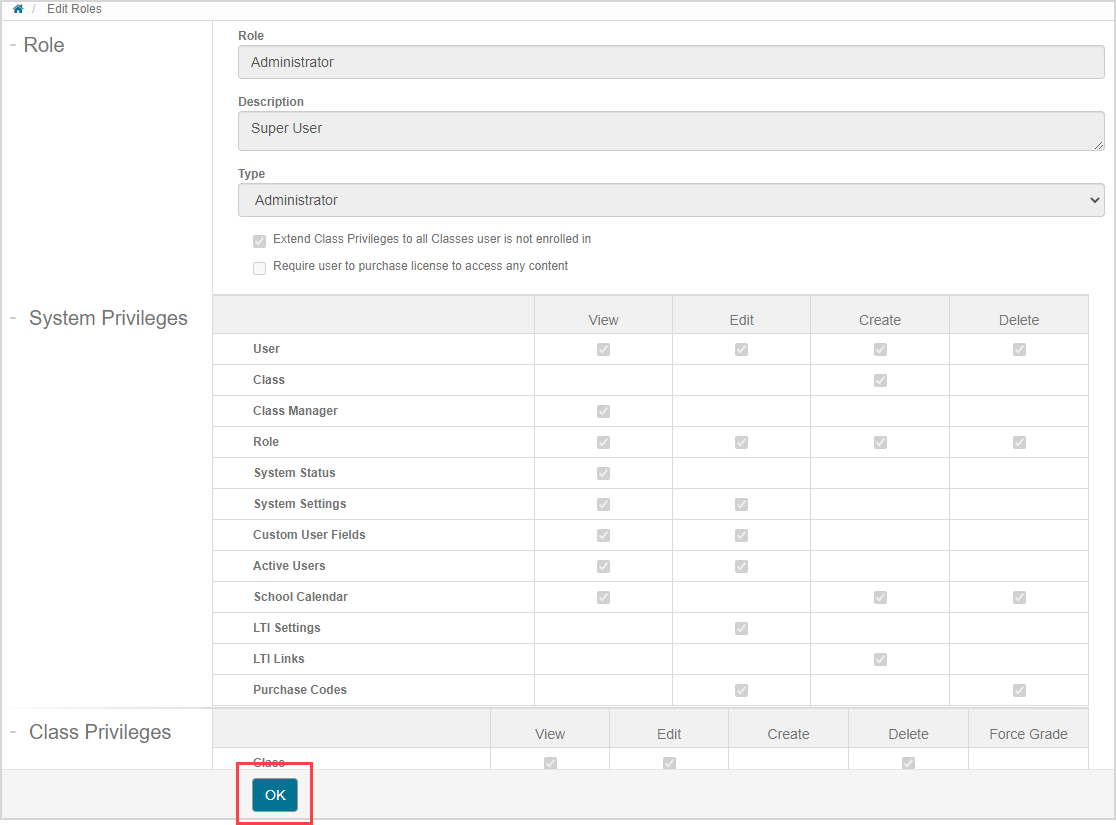
TIP: Your role and any role with higher privileges displays as a read-only summary while viewing the details and allowed privileges. Click OK to return to the Role Manager's main page.

Create a custom user role
You can create a new custom user role with a unique title and set of privileges within your organization.
To create a custom user role:
Decide what role category you want your new custom user role to be associated with (this will determine what privileges are available for you to select). Example — If you want to create an instructor that can create classes, you'll want to create a user in the Class Roles category.
Click Create Administrator Role, Create Class Role, or Create Student Role depending on your decision from step 1.

Assign a name for the role.

TIP: Ensure that the name of your custom user role is unique compared to the user roles that already exist in your organization.
Enter a description for the custom user role.

TIP: Ensure that the description of your custom user role is unique compared to the user roles that already exist in your organization.
NOTE: The type of custom user role is determined by the category you used to create the custom user role and can't be changed.

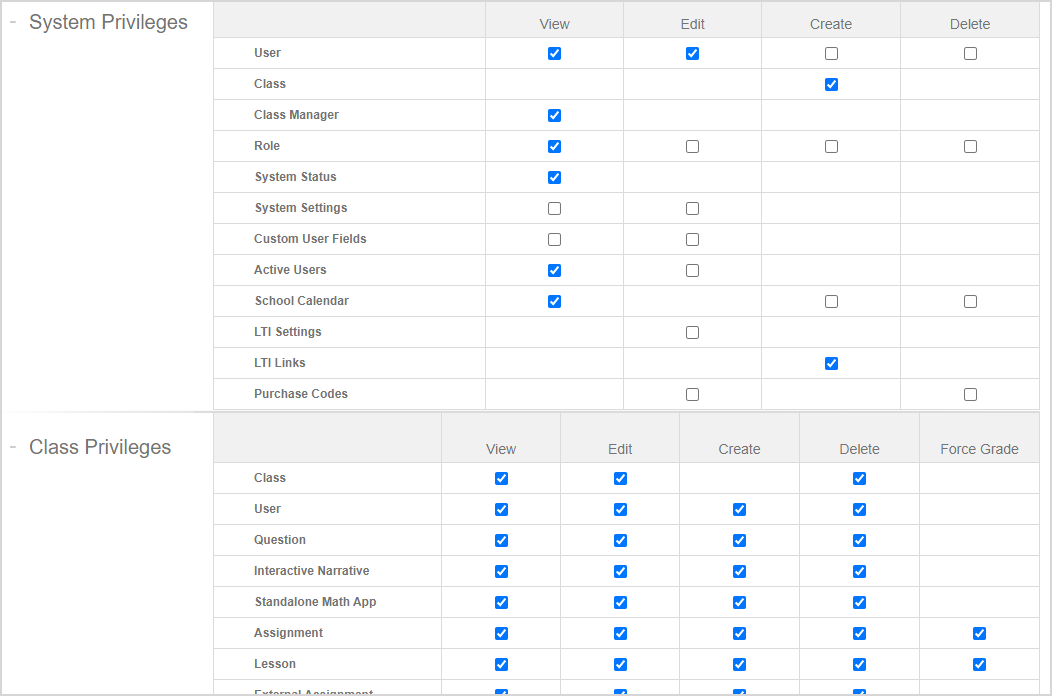
Select the Extend Class Privileges to all classes user is not enrolled in check box to allow the user to maintain the allowed Class Privileges (see step 6) even in classes that they aren't enrolled in.

TIP: Example — Assume that the View Class, Edit Class, and Delete Class privileges from the Class Privileges are enabled for this role.

Selecting the Extend Class Privileges to all classes user is not enrolled in check box enables this role to be able to edit other instructors' classes even if they aren't enrolled as an instructor, themselves.
IMPORTANT: The Require user to purchase license to access any content check box will only be visible to you if licensing has been enabled for your organization. DigitalEd's Support Team manages this setting and there's no need for you to interact with this setting if it's visible to you.

Select or deselect the check boxes of the available privileges that you want to enable or disable for this custom user role.

NOTE: Some check boxes are selected by default depending on which role category you selected at step 2. You can override these default selections as needed.
Click Submit to save your new custom user role.

Your new custom user role now appears listed on the Role Manager's main page in the appropriate role category.

Clone an existing user role
Cloning roles makes it easier to create a new custom role that is very similar to an existing role.
Cloning prevents you from having to remember each individual privilege that the original parent role has, but allows you to modify it to make a new but similar custom role.
To clone an existing role:
Click Clone in the row of the existing user role that you want to copy.

(Optional) Define a new name for the cloned user role.

NOTE: The user role clone uses the following default naming structure: Original user role name - clone.
Define a description of the user role clone to distinguish it from the original parent user role.

Complete steps 5 to 8 of the Create a custom user role section.
Edit an existing user role
You can edit the details and privileges of existing user roles through the Role Manager.
To edit an existing user role:
Click on the name of the user role you want to edit.

Make your edits to the user role as needed.
TIP: Click Restore to Default to recover the settings of the default roles of your organization if you've edited them.

IMPORTANT: Custom user roles and user role clones don't have a Restore to Default function.
Click Submit to save your edits.

The updated user role is saved to your Role Manager.
Delete an existing user role
You can delete custom user roles and user role clones through the Role Manager.
These roles can be deleted until a user is assigned the custom user role or user role clone, at which point, the delete function becomes unavailable.
NOTE: Default user roles can't be deleted.
To delete a custom user role or user role clone:
Click Delete in the row of the unassigned custom user role or user role clone that you want to delete.

Click OK to confirm the user role deletion.

The selected user role is deleted from your Role Manager.
