Use the Align Environment icon
Jump to section
The Align Environment icon  of the Visual Editor generates an invisible table that's used to align inputted text and media.

TIP: Check out Use the Visual Editor to learn more about all of the icons on this toolbar.
After inserting an invisible table using the Align Environment icon, text and media can be inputted into the individual cells of the invisible table and the content and table dimensions can be edited.
Insert an invisible table
To insert an invisible table using the Align Environment icon:
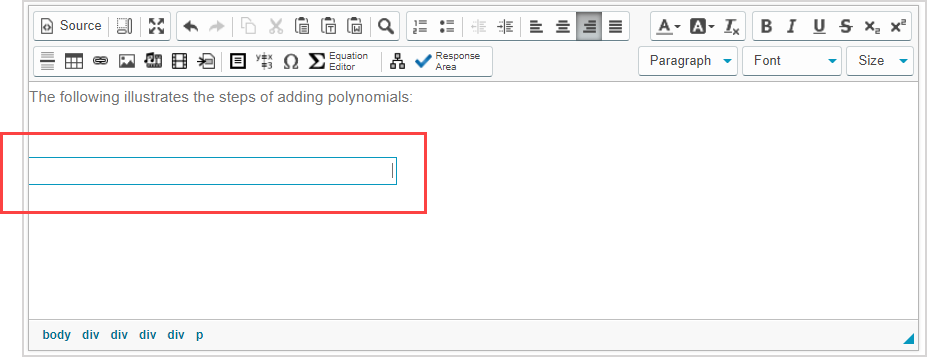
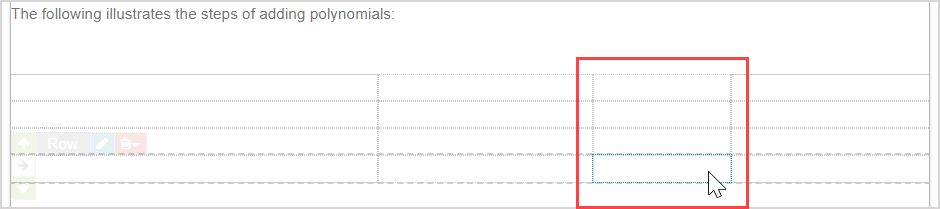
Place your cursor in the text entry window where you want your invisible table to be inserted and click the Align Environment icon.

By default, an invisible table consisting of one row and three columns is inserted at your cursor's position, and your cursor is relocated to the first column of the row.
TIP: Hover your cursor over your newly inserted row to see the full layout of the full table.

TIP: The inserted table has the following default properties:
Check out the Edit column width, alignment, and visibility section of this help topic to see how to edit these properties.
Add a row
To add a row to an existing invisible table:
Hover your cursor over the most left side of the row that you want to use to add a new row. This reveals the row toolbar.

Click to Add Row Above
 or Add Row Below
  to add a new row directly above or below the row used to reveal the row toolbar.

The new row is added above or below (depending on your selection from step 2) with the same dimensions as the row used to reveal the row toolbar.

Add a column
To add a column to an existing invisible table:
Hover your cursor over the upper right side of the column you want to use to add a new column. This reveals the column toolbar.
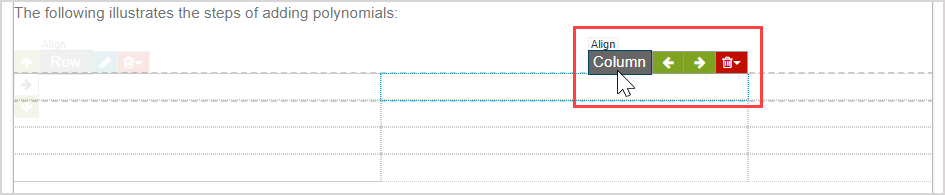
Click to Add Column to Left
 or Add Column to Right
  to add a new column directly beside the column used to reveal the column toolbar.
The new column is added and is 25% of the width of the column used to reveal the column toolbar.
Select a row
Selecting the row of an invisible table allows for bulk formatting of the text and media contained within that row (Example — selecting a row to apply bold text formatting to all text content within that row).
To select a row of an invisible table for bulk formatting of its text and media:
Hover your cursor over the most left side of the row you want to select for bulk text and media formatting. This reveals the row toolbar

Click Select Row
 .
.
![]()
The selected row becomes highlighted. You can now apply text and media formatting from the Visual Editor toolbar in bulk to all contents within the selected row (Example — apply bold text formatting to all text within the row).

TIP: Check out Use the Visual Editor for more information on the available formatting options of the Visual Editor toolbar.
TIP: Alternatively, you can use your cursor to highlight the specific text or media of interest and then apply your formatting if you don't want to apply formatting to an entire row.
Edit column width, alignment, and visibility
To edit the properties of width, alignment, and visibility of the columns within your invisible table:
NOTE: Column height automatically adjusts to fit the inputted text and media.
Hover your cursor over the most left side of any row in the invisible table that you want to edit. This reveals the row toolbar.
Click Edit
 .
.

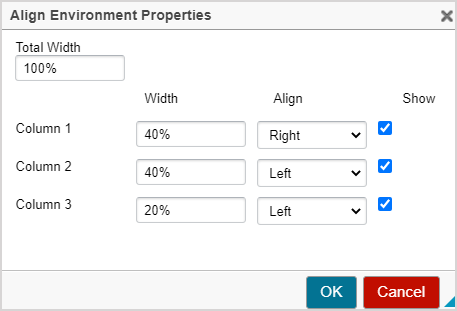
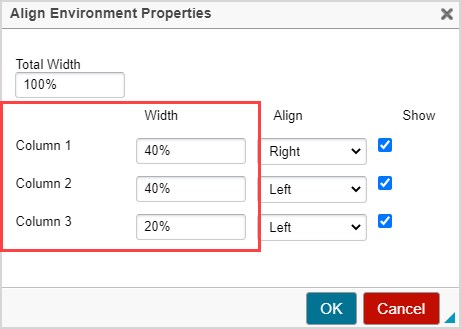
The Align Environment Properties window is displayed.
Edit the Total Width field as needed to define the total width of your invisible table in the text entry field that you're working in.

NOTE: Be sure to include a unit of measure in your total width entry. It's recommended to use percent (%) or pixels (px).
Edit the width of each column of your invisible table.
NOTE: Be sure to include a unit of measure in your column width entry. It's recommended to use percent (%) or pixels (px).
IMPORTANT: Ensure that the sum of the column widths at step 5 is equal to or less than the total width of the invisible table defined at step 4.
TIP: Alternatively, you can click-and-drag the inner borders of the invisible table to adjust the column widths of your invisible table.

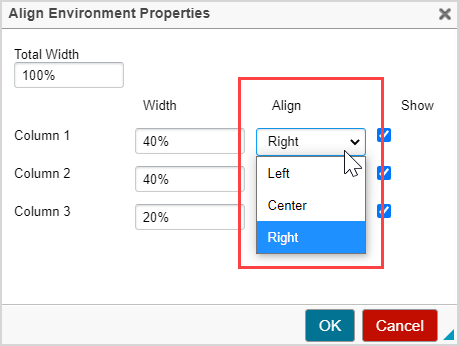
Click the Align drop-down menu to select how your inputted text and media should be aligned within each column of the invisible table.
TIP: Alternatively, you can use your cursor to highlight the text and media of interest and use the Align Left, Center, Align Right, or Justify icons of the Visual Editor. Check out Use the Visual Editor for more information on the available formatting icons.
Use the Show check box to define the visibility of the column:
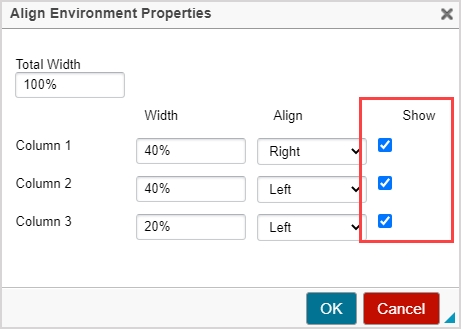
- Show check box is selected — You can input text and media, and the column's contents are visible when previewed or viewed.
- Show check box is deselected — You can't input text and media, and the column's contents (if entered before changing this property) aren't visible when previewed or viewed.
Click OK to save your changes.

Delete a row
To delete a row from an invisible table:
Hover your cursor over the most left side of the row that you want to delete. This reveals the row toolbar.

Click (A) Delete
 and then (B) Confirm.
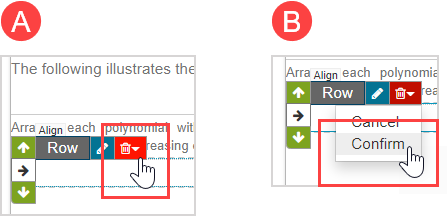
The row and its contents are deleted from your invisible table.
Delete a column
To delete a column from an invisible table:
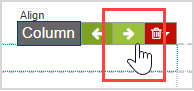
Hover your cursor over the upper right side of the column that you want to delete. This reveals the column toolbar.

Click (A) Delete
 and then (B) Confirm.

The column and its contents are deleted from your invisible table.