Connect Möbius to Moodle
Jump to section
Configure an LTI 1.3 External Tool in Moodle
Update an old Moodle tool to LTI 1.3
The Moodle™ Learning Management System can be connected to Möbius using LTI 1.3 integration.
IMPORTANT: Moodle™ version 3.8.3 is recommended by DigitalEd for best results with Deep Linking and LTI 1.3 integration. There's a known issue with Deep Linking and Moodle™ version 4, while older versions of Moodle™ don't support grade pushing with LTI 1.3 integration.
Möbius and Moodle™ administrators can follow these instructions to connect their Moodle™ Learning Management System to Möbius.
View my Möbius LTI data
Your Learning Management System will require you to provide data that's specific to your Möbius site.
Check out View my Möbius LTI data for details on how to obtain this data.
Configure an LTI 1.3 External Tool in Moodle
To add your Möbius site as an External Tool in Moodle using the data from your Möbius site:
Log in to your Moodle administrator account and click Site Administration.

On the Plugins tab, click Manage tools.

Click the Configure a tool manually link.

Complete these fields under the Tool Settings heading:
- Tool Name: Enter a unique name for the new tool (Example — Möbius MyInstitution).
- Tool URL: Enter the Tool URL value attained from View my Möbius LTI data.
- Tool Description: An optional field to record any useful information.
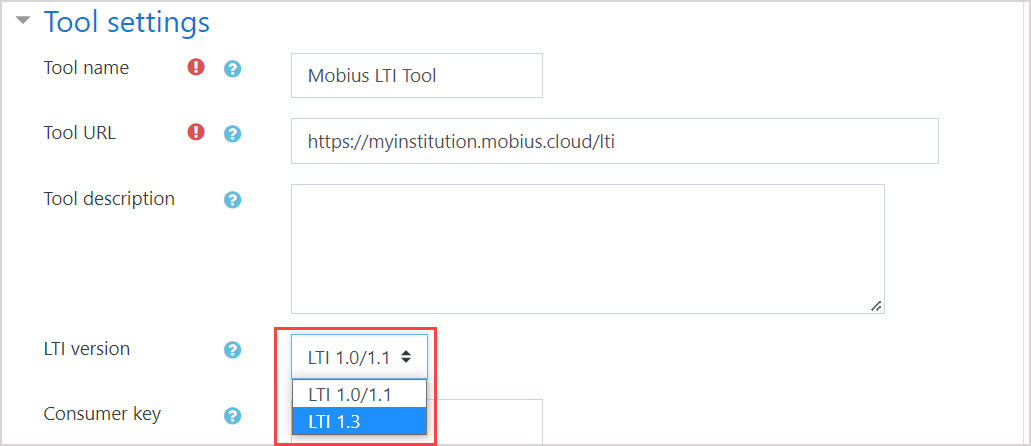
- LTI Version: Select LTI 1.3 from the drop-down list.

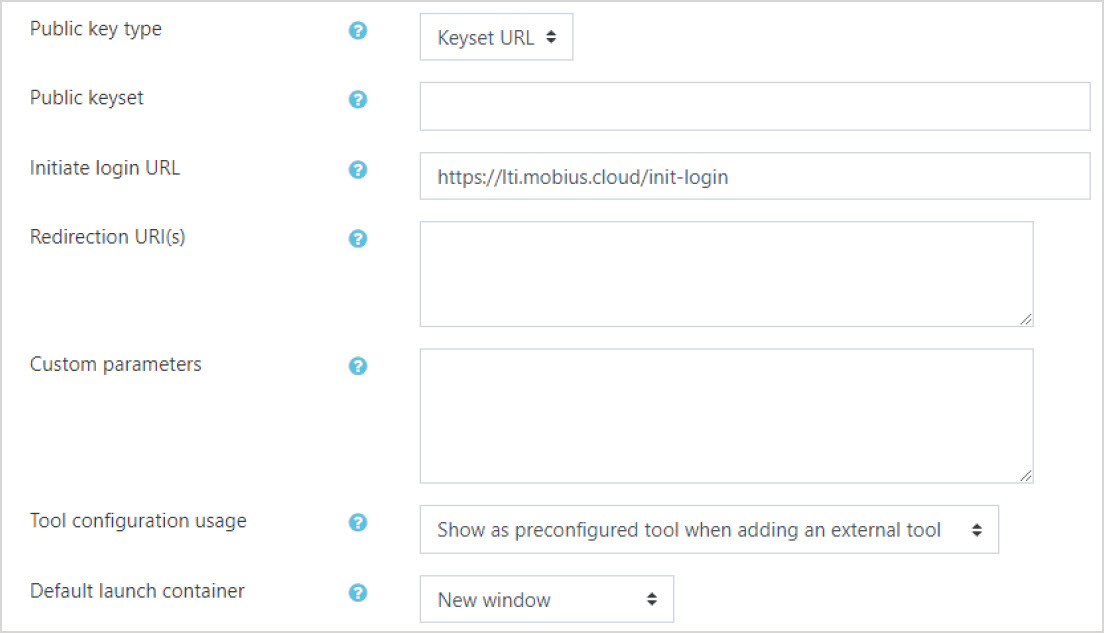
- Public Key Type: Select Keyset URL from the drop-down list.
- Public Keyset: Enter the Public JWK Set URL value attained from View my Möbius LTI data.
- Initiate Login URL: Enter the Initiate Login URL value attained from View my Möbius LTI data.
- Redirection URI(s): Enter the Redirection URI value attained from View my Möbius LTI data.
- Tool Configuration Usage: Select Show in activity chooser and as preconfigured tool from the drop-down list.
- Default Launch Container: Select New window from the drop-down list.
NOTE: If you didn't enable Auto Create Grade Items in Step 15, you'll need to manually add a Grade Item to the link:
- Click the Actions button and select View Topic.
- In the Assessment category, select a grade item using the drop-down menu, or create a new one using the link.
- Click Save to confirm the change.
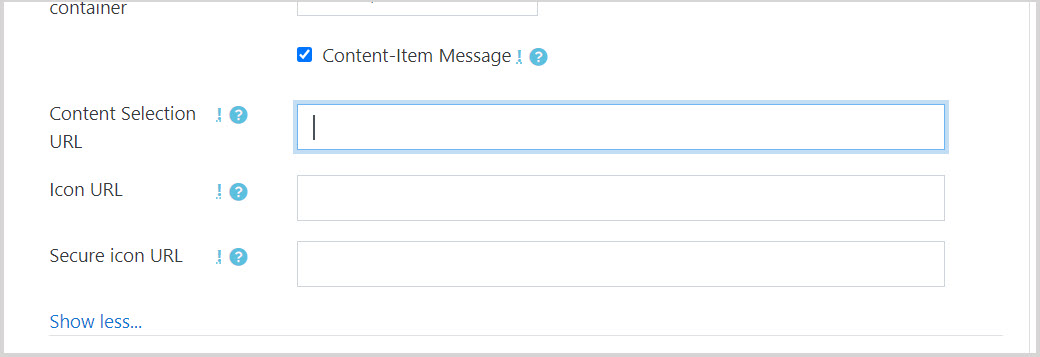
Click the Show More link to set the following options:
- Content-Item Message: Select the Content-Item Message checkbox.
- Content Selection URL: Enter the Content Selection URL value attained from View my Möbius LTI data.
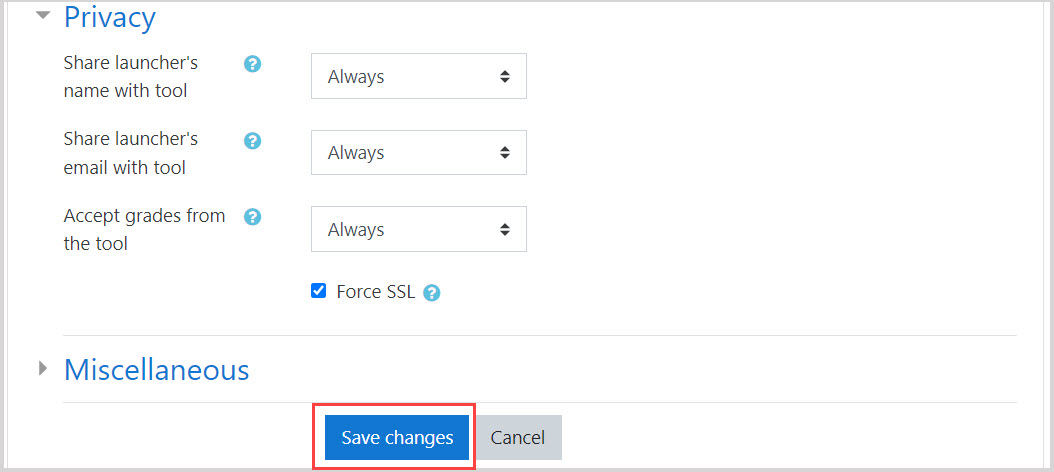
Expand the Privacy section and enable the following options:
- Share launcher's name with tool
- Share launcher's email with tool
- Accept grades from the tool
- Force SSL
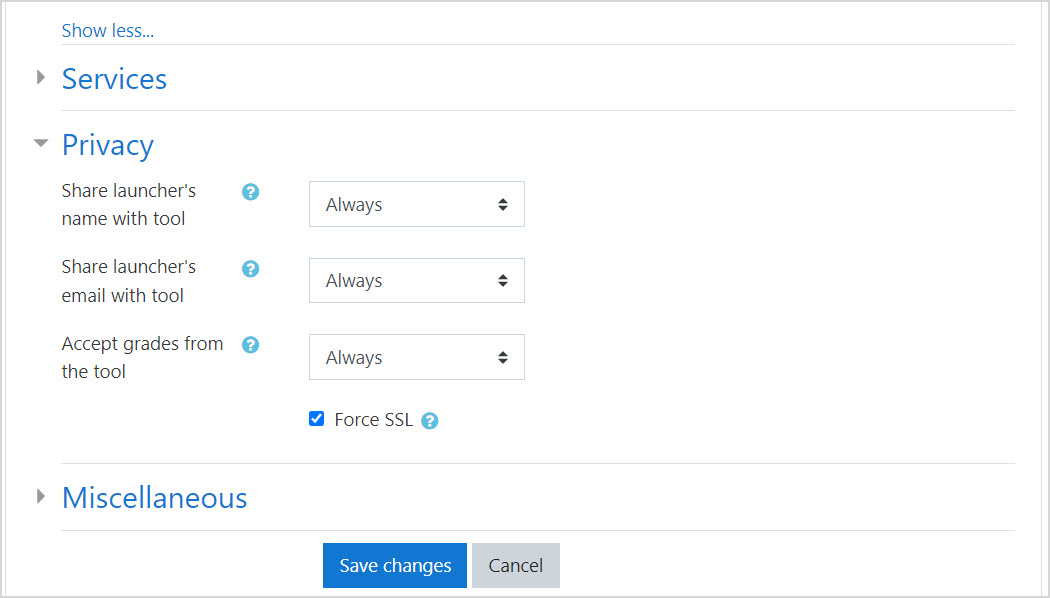
Click Save changes.
Your new LTI tool will be displayed on the Developer Keys page. Click the View configuration details icon.
Copy all values, including the Client ID and Deployment ID, for the next steps of the setup process.
Update an old Moodle tool to LTI 1.3
If you already have Möbius installed as an LTI 1.0/1.1 tool in Moodle, the tool can be easily changed to an LTI 1.3 tool.
IMPORTANT: If updating to LTI 1.3, existing LTI links to Möbius will continue to work only if the existing LTI tool is edited in this way.
To edit your LTI tool in Moodle:
On the Plugins tab of the Site administration page, click Manage tools
Find the existing Möbius LTI 1.0 tool, and click the gear icon to edit the tool.

From the LTI version drop-down list, select LTI 1.3.
Change the Tool URL and other fields as given in Configure an LTI 1.3 External Tool in Moodle.
Click Save changes.
Add the Moodle configuration to Möbius
To add the completed Moodle LTI 1.3 configuration details to Möbius:
Click Add Configuration on the Edit LTI Configurations page in Möbius.

TIP: Check out Add an LTI configuration to Möbius for more details on getting to this page in Möbius.
Complete the fields attained from Moodle in Step 10 to the Add LTI 1.3 Configuration window.

Click Save.

Link to a Möbius assignment from your Moodle course
Once configured, the integration between Moodle and Möbius should be tested by linking from Moodle to a Möbius assignment, attempting the assignment as a student, and checking that grades are pushed back to Moodle.
To use the configured External Tool to add an assignment link to your Moodle course:
Open your Moodle course for editing, and click Add an activity or resource.

Select the button corresponding to the Möbius External Tool.

NOTE: If your tool doesn't appear here, it's because in Step 5 the Tool Configuration Usage setting was set only to show as a preconfigured tool. This disables the tool by default in new classes; to enable this tool for the current class:
- In Course Navigation, click More and select LTI External Tools from the drop-down menu.
- Next to the name of your tool, enable the Show in Activity chooser radio button.
Click Select content.

The Möbius mapping menu will appear for configuration of the link destination — check out Activity mapping for details on completing this configuration and linking to a Möbius Assignment.

After the mapping menu closes, complete the fields under the Grade heading as required for your assignment.

Click Save and display at the bottom of the page.

TIP: Check out the LMS Integration Workflows for a visual representation of creating and using different types of links from Möbius to Moodle:
What's next?
Now that you've connected Moodle to Möbius, you're ready for: