Create an assignment
Assignments offer interactive opportunities for students to demonstrate their understanding of your lessons.
Assignments are graded assessments that can be used for student practice or count towards student Gradebooks.
NOTE: Möbius assignments are any type of online assessment (Example — exams, homework assignments, placements tests, quizzes, unit tests, etc.).
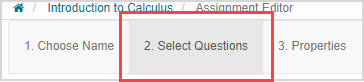
The Assignment Editor is used to generate assignments and has 3 components:
- The Choose Name tab to name your new assignment.
- The Select Questions tab to define your assignment questions.
- The Properties tab to define the assignment properties.
NOTE: A new assignment that's created in a parent class is automatically inherited (except for the Text to show at the head of each page and Text to show on the results page) by a child class. Changes to that parent class’s assignment are inherited by a child class as follows:
- Changes to the assignment name, short name, and description are inherited
- Changes to the text to show at the head of each page and on the results page aren't inherited
- Changes to the assignment questions are inherited
- Changes to the assignment properties aren't inherited
- Changes to the assignment Policy Set (if a Policy Set was applied) are inherited
Only certain components of an inherited assignment can be edited within child class. Check out Edit an assignment. These edits will only apply to that child class and its descendants.
TIP: Check out the Homework & Assessment Workflows for a visual representation of how to configure different types of Möbius assignments:
Assignment Editor's Choose Name tab
Creating a new assignment begins with the Choose Name tab of the Assignment Editor.
IMPORTANT: If you do not interact with Möbius for 60 minutes, you will be automatically logged out of your session and your progress is not auto-saved. If you plan to stop interacting with the Assignment Editor for more than a few minutes, it's strongly recommended that you save your work.
To create a new assignment:
NOTE: You may have to click the expand icon to view certain properties.
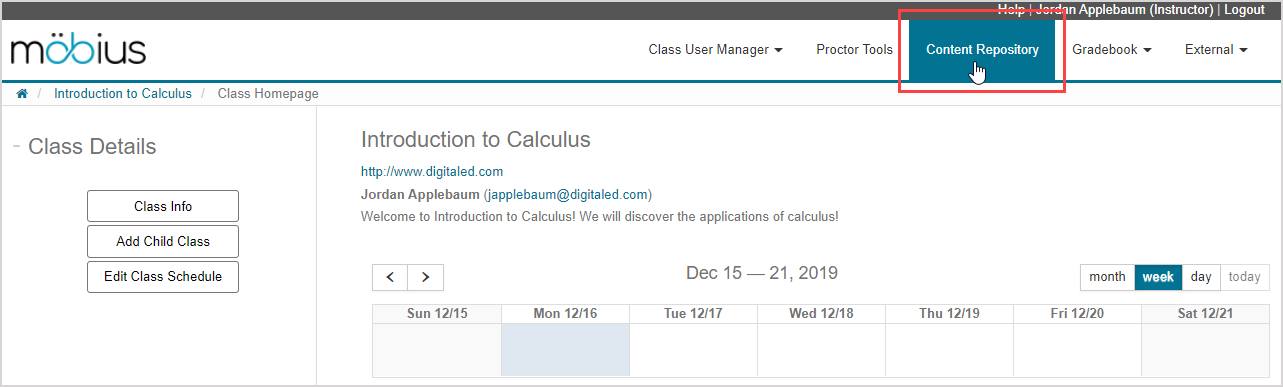
Click Content Repository on the Class Homepage.
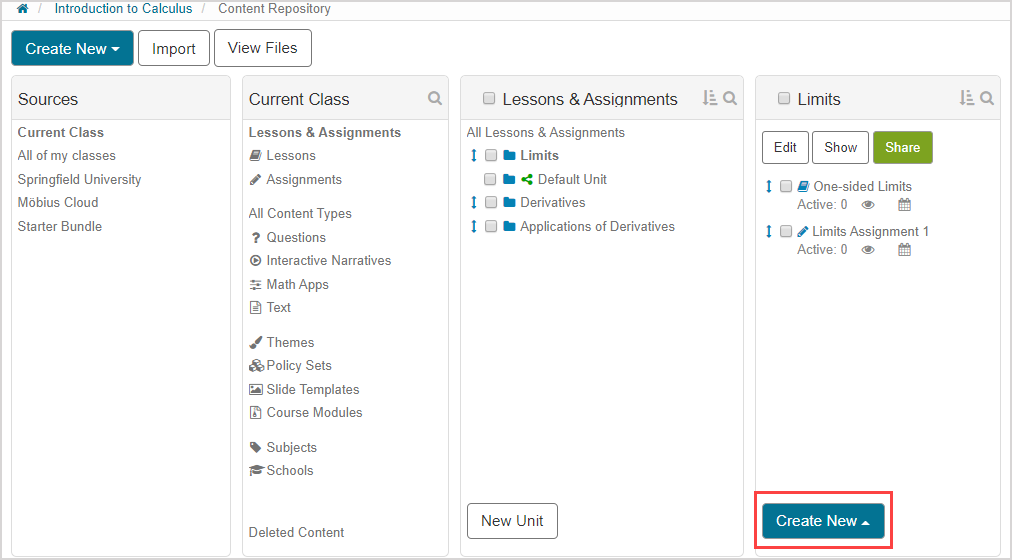
Click Create New on the main Content Repository menu.

TIP: You can also navigate within the Content Repository to the unit that you want to build your new assignment in and:
Click Create New.
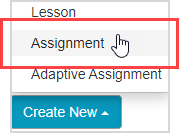
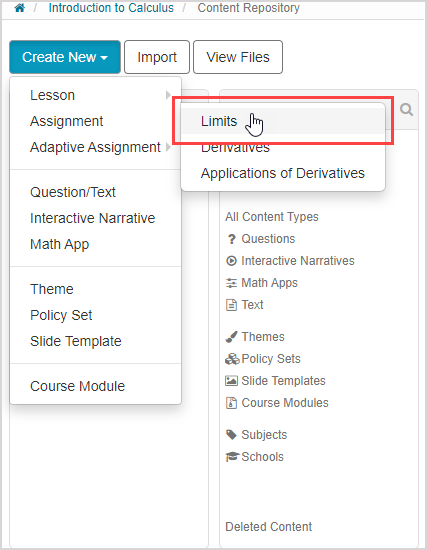
Click Assignment from the Create New menu.
Resume at step 5 of Assignment Editor's Choose Name tab.
Hover your cursor over Assignment on the Create New menu to reveal a list of all available units in your class.
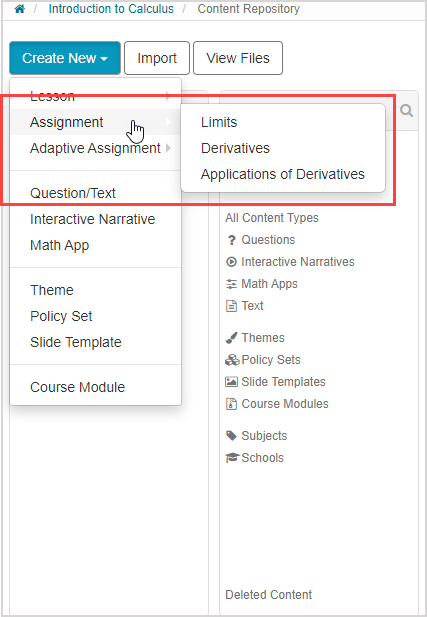
Click the unit that you want to build your new assignment in.
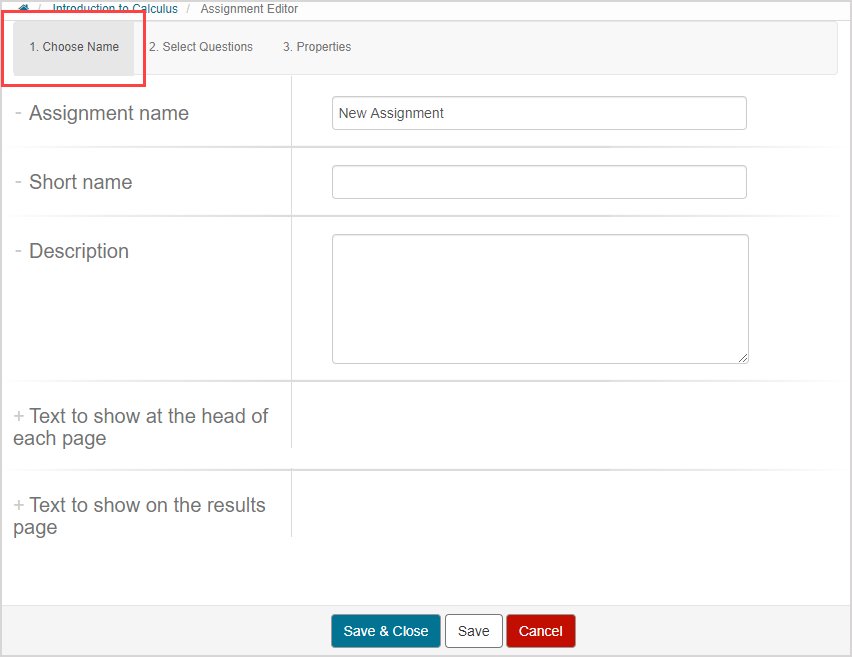
Define the assignment name.

TIP: The assignment name is displayed to your students on the Class Homepage. Ensure that your assignment name is unique, informative, and easily identifiable.
Define a short name of the assignment.

TIP: The short name is displayed only when screen space is limited.
Define a description of the assignment.

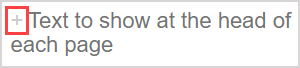
Define the text to show at the head of each page of the assignment.

TIP: Check out Use the Visual Editor for details on how to use this toolbar to the fullest to control the visual appearance of your header text.

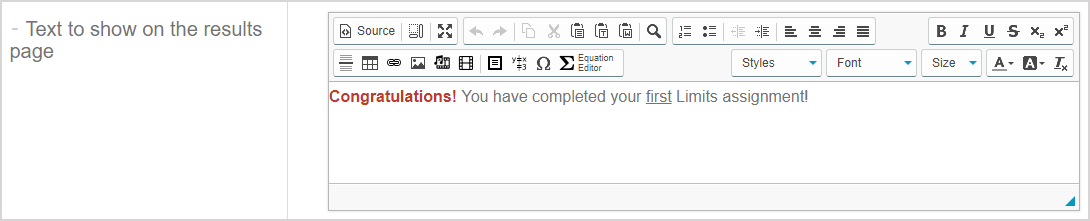
Define the text to show on the results page of the assignment after it is submitted.
TIP: Check out Use the Visual Editor for details on how to use this toolbar to the fullest to control the visual appearance of your results page text.
TIP: The text to show on the results page is displayed as a part of the graded assignment report.
Click Save.

Click 2. Select Questions to add questions to your assignment.
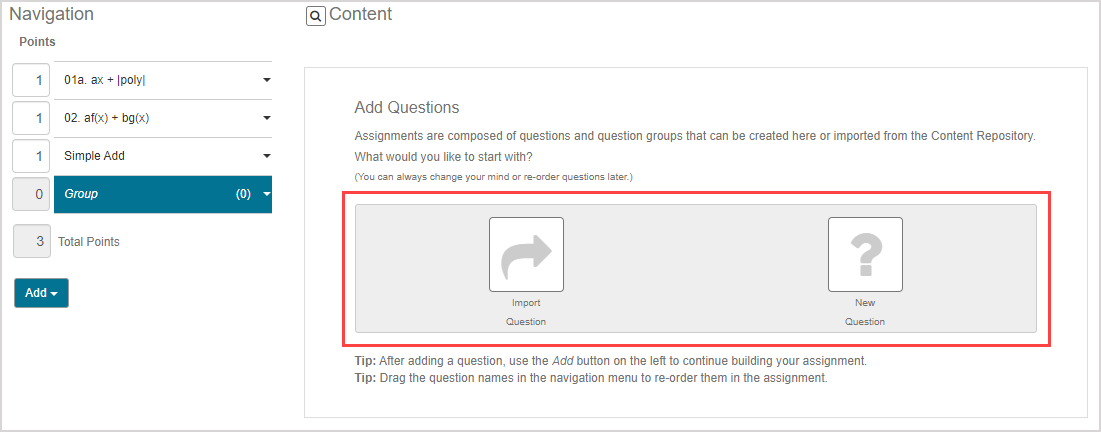
Assignment Editor's Select Questions tab
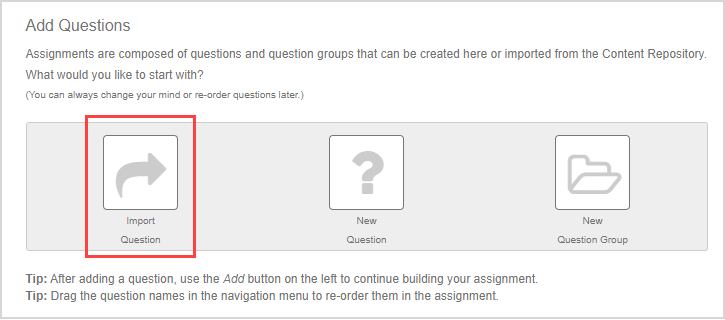
Add questions to your assignment using the Select Questions tab of the Assignment Editor.
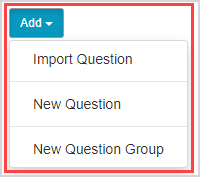
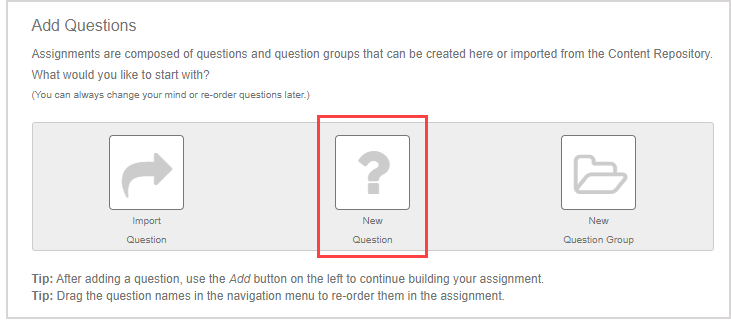
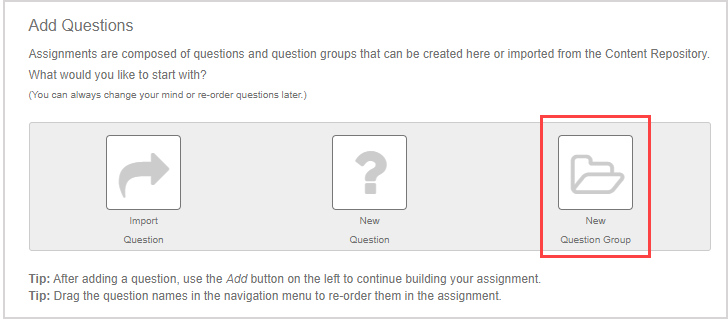
You can add questions to your assignment by:
- Importing questions
- Creating new questions
- Creating new question groups
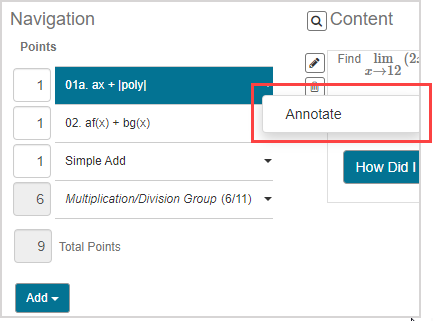
TIP: Individual questions in your new assignment can be annotated. Annotations can provide links or supplementary instructions for a specific question.
To annotate any question:
Click the question arrow
 .
.
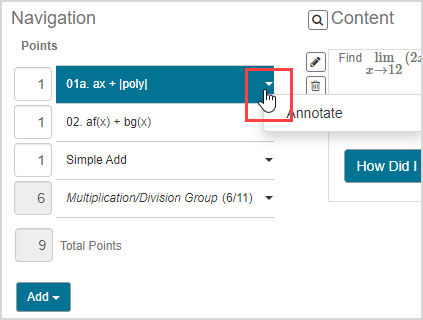
Click Annotate.
The Annotate Question window appears. Choose the position of the annotation.
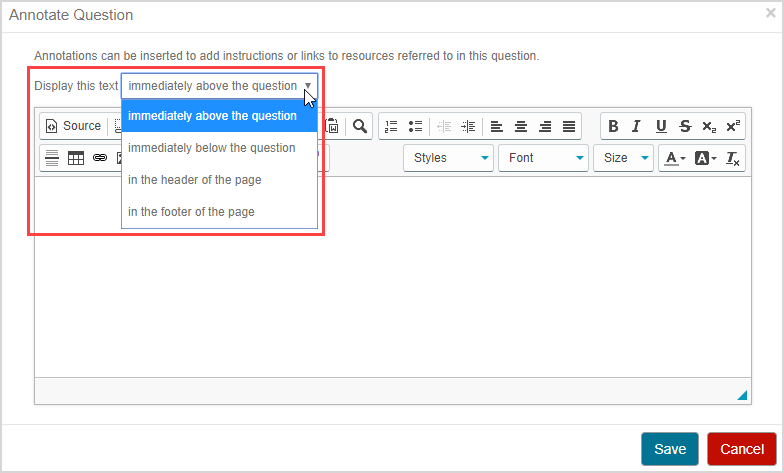
Define the annotation (use the Visual Editor to control the visual appearance of your annotation).
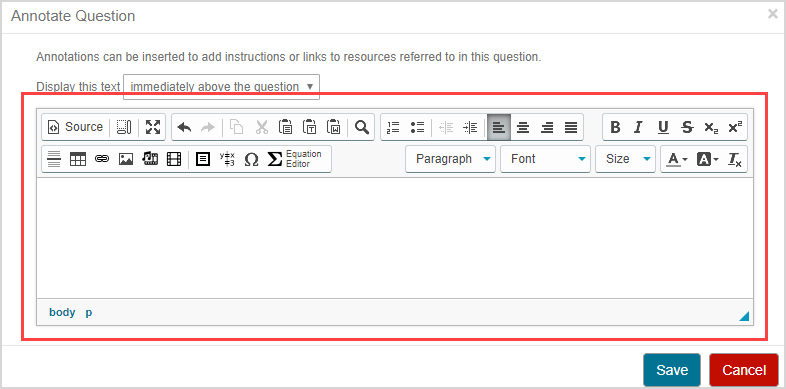
Click Save.

Import questions into your assignment
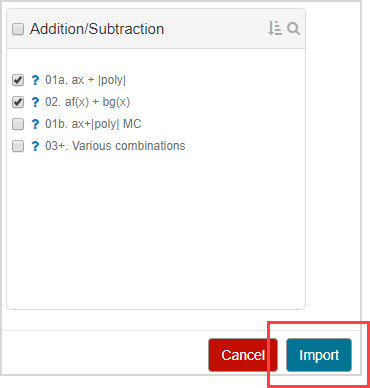
Click Import Question.
The Content Repository opens. Click Questions and navigate to where the questions you want to import are stored.
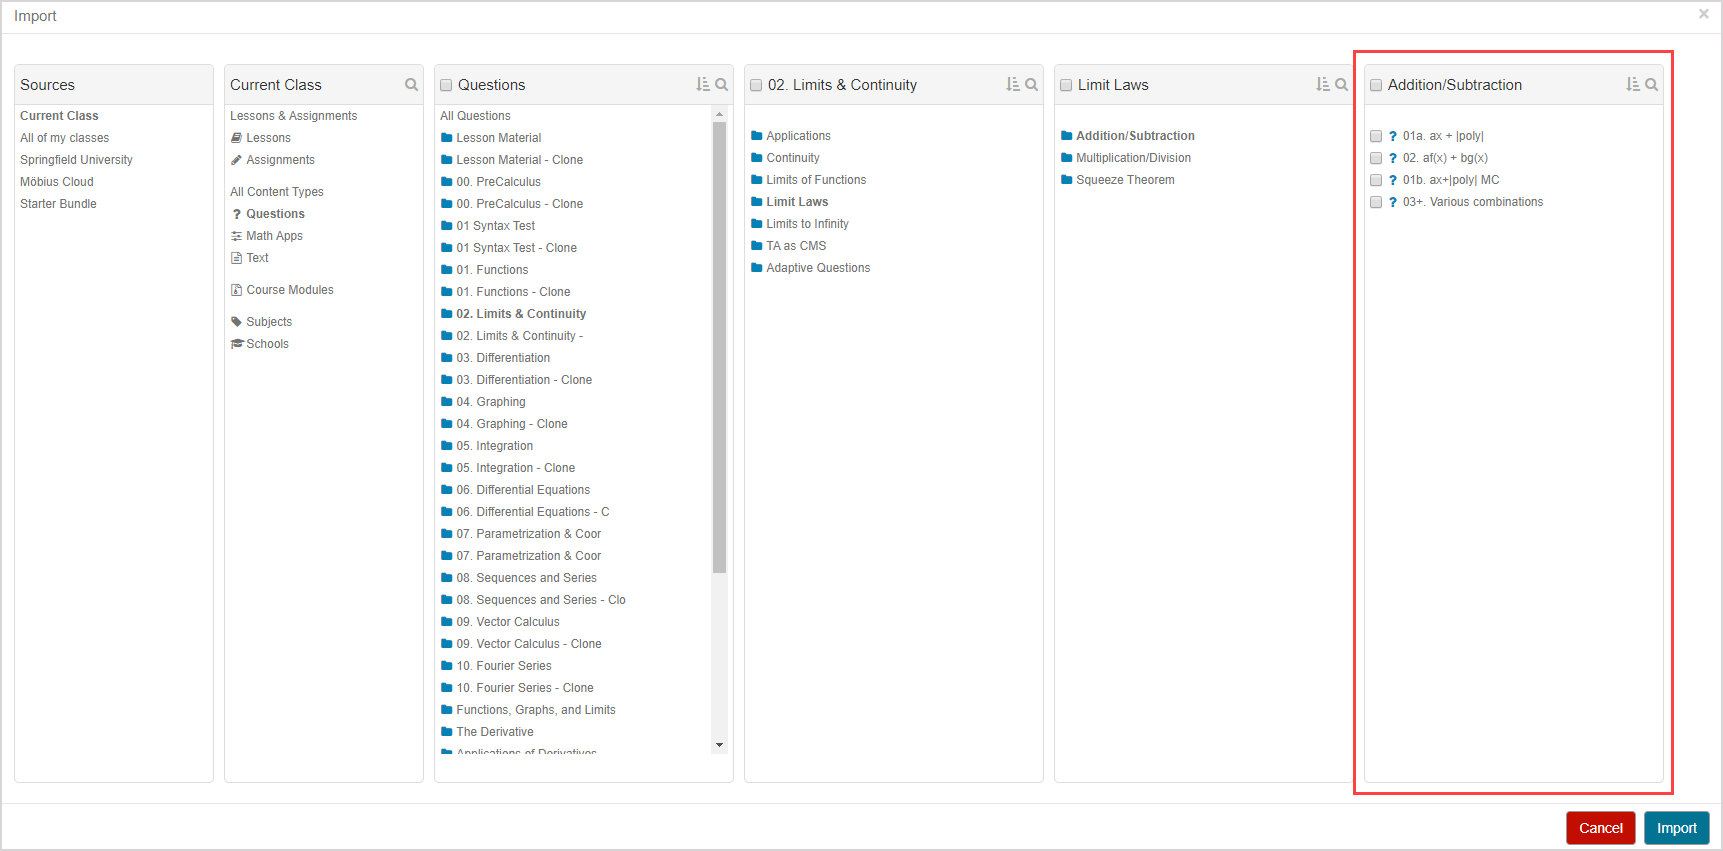
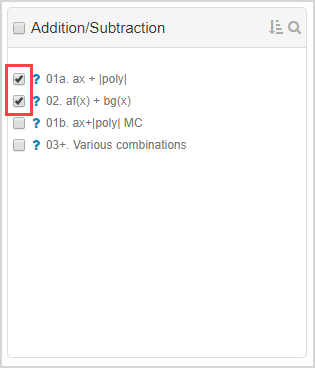
Select the check boxes of the questions that you want to import.
Click Import.
The imported questions now appear in the Navigation pane of the Assignment Editor.
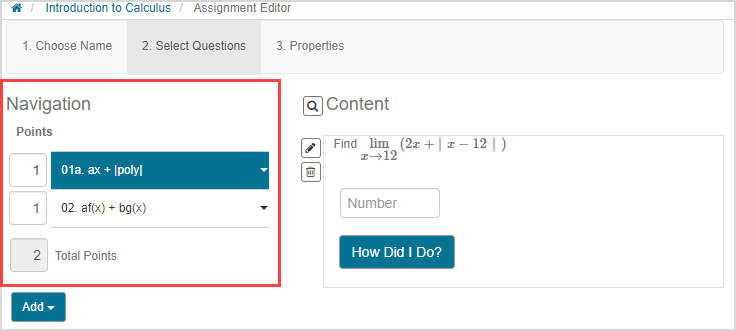
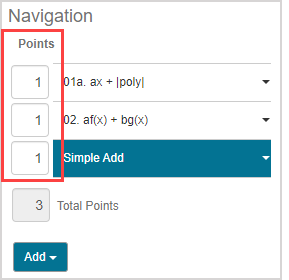
Click the Points box to manually define the scoring weight of the question.
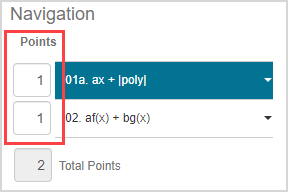
NOTE: The scoring weight of a question defaults to 1. These point values apply only to assessment-style assignments such as homework, quizzes, anonymous practice, and proctored exams. Mastery and study session dialogs do not use these points because they employ other pedagogical scoring models.
Click the Add arrow
to add more questions to your assignment.
TIP: After adding questions to your assignment, you can organize the order of the questions in the Navigation pane by clicking and dragging the question to the desired position.
Click Save when you are done.
TIP: Check out Delete an assignment question for help with removing a question from an assignment.
Create new questions in your assignment
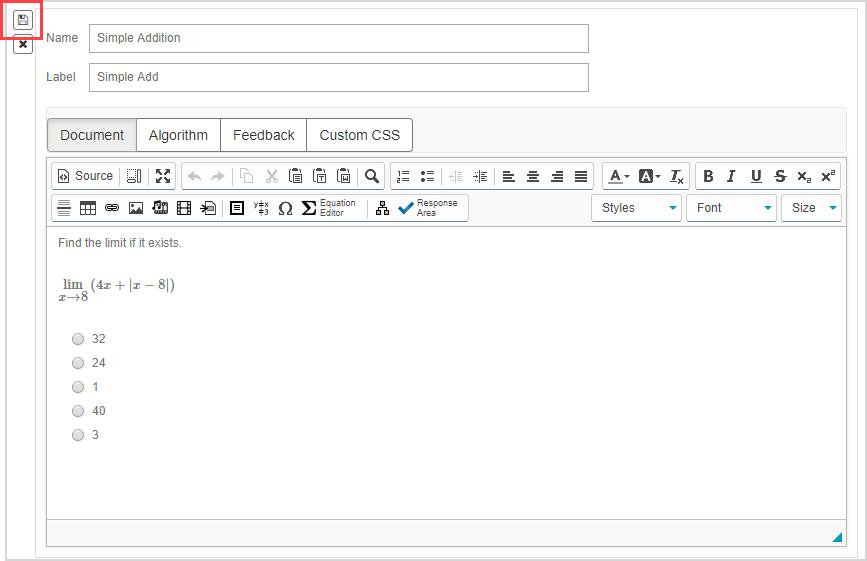
Click New Question.
The Question Editor opens. Design your new question.
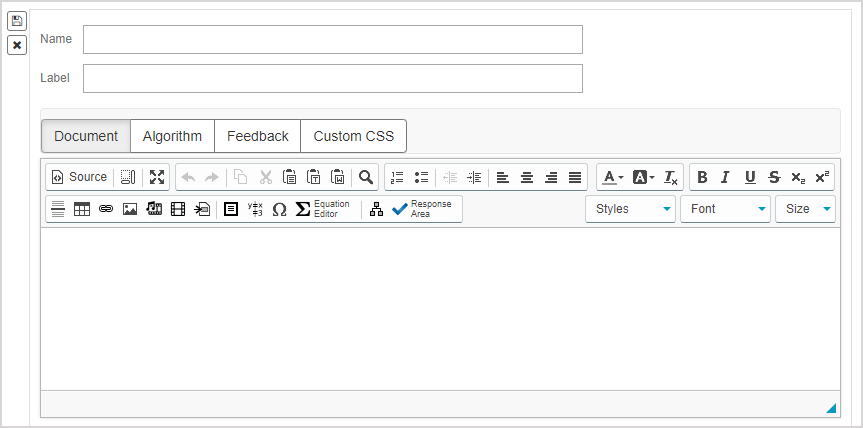
TIP: Check out Use the Visual Editor for details on how to use this toolbar to the fullest to control the visual appearance of your question text.

Click the Save icon in the Question Editor.
Your new question now appears in the Navigation pane of the Assignment Editor.
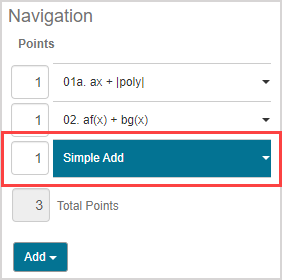
Click the Points box to manually define the scoring weight of the question.
NOTE: The scoring weight of a question defaults to 1. These point values apply only to assessment-style assignments such as homework, quizzes, anonymous practice, and proctored exams. Mastery dialogs, study session dialogs, and adaptive assignments don't use these points because they employ other pedagogical scoring models.
Click the Add arrow
to add more questions to your assignment.
TIP: After adding questions to your assignment, you can organize the order of the questions in the Navigation pane by clicking and dragging the question to the desired position.
Click Save when you are done.
Create a new question group in your assignment
Question group — A defined subset of questions selected from the Content Repository that can be used in an activity.
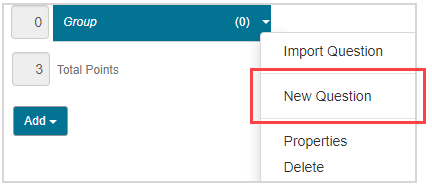
Click New Question Group.
The new Group appears in the Navigation pane of the Assignment Editor.
![]()
Click the Group arrow
to decide what function to use for this new question group:
- Click Import Question to copy questions from the Content Repository just like you would do for a question that isn't in a question group.

- Click New Question to create a new question just like you would do for a question that isn't in a question group.
TIP: You can also use the quick menu to import or create questions for your new question group.
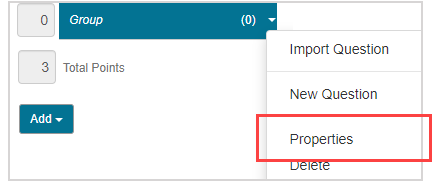
Click Properties in the Group menu to:
- Edit the name of the question group
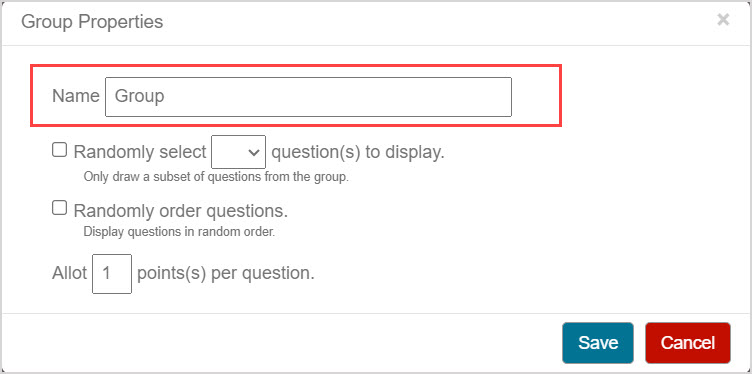
- Select the Randomly select n question(s) to display check box to display only a random subset of questions from the question group to the student.
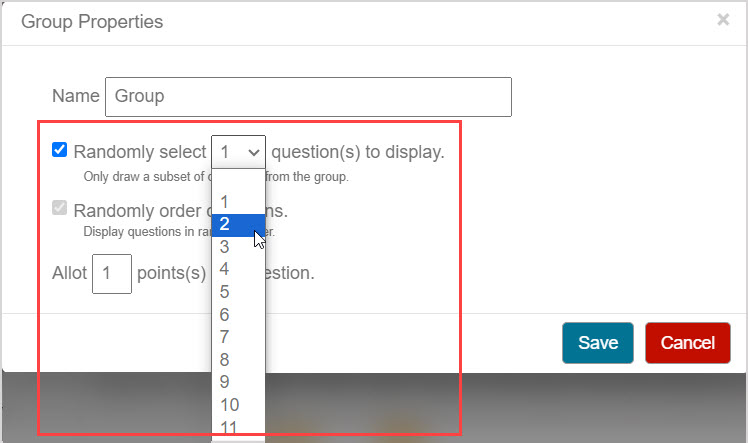
NOTE: If the Randomly select n question(s) to display option is selected (where n is the number of questions), select a number from the drop-down list to define the subset of random questions to be displayed in the assignment. The number of options available in the drop-down list match the number of questions in your question group.
NOTE: If the Randomly select n question(s) to display check box is not selected, all questions in the question group are displayed in the assignment.
- Choose whether to randomize the order of questions in the question group when displayed to the student.
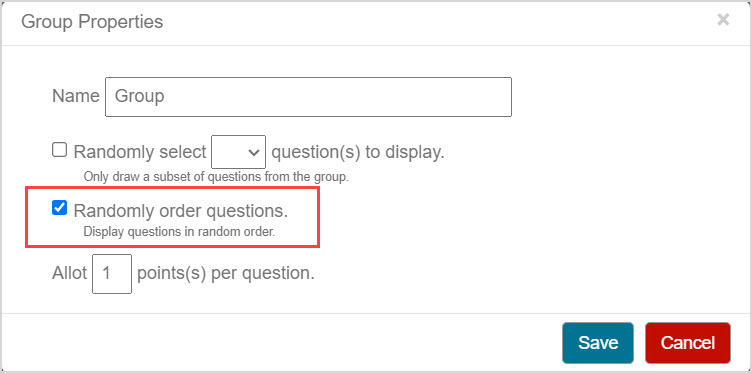
NOTE: If the Randomly select n question(s) to display option is selected (where n is the number of questions), then the order of the questions displayed to the student will also be random; the Randomly order questions option is automatically selected.
- Assign the scoring weight of each question in the question group.
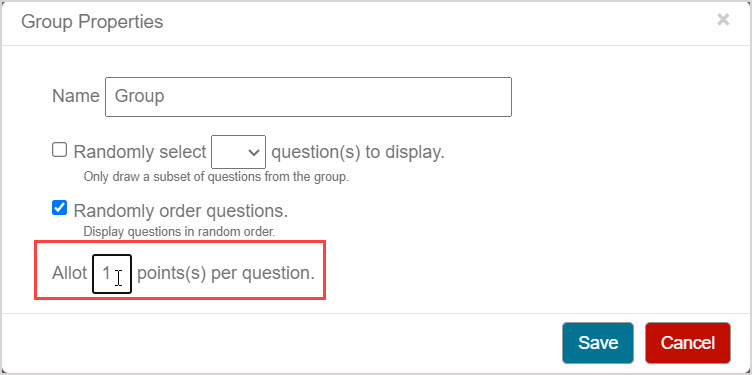
NOTE: Each question in the question group is assigned the weight that you define in the Allot n point(s) per question box (where n is the manually defined scoring weight). These point values apply only to assessment-style assignments such as homework, quizzes, anonymous practice, and proctored exams. Mastery and study session dialogs do not use these points because they employ other pedagogical scoring models.
Click Save in the Group Properties window.
Click the Add arrow
to add more questions to your assignment.
TIP: After adding questions to your assignment, you can organize the order of the questions in the Navigation pane by clicking and dragging the question to the desired position. You can also reorganize questions within question groups by clicking and dragging them to new positions.
Click Save when you are done.
What's next?
Now that you've understood how to create an assignment, you're ready for: