Author a spreadsheet question
Jump to section
To author a spreadsheet question
Formulas and functions in the spreadsheet
A spreadsheet question involves students entering data into the spreadsheet as directed by the question text.
Spreadsheet questions are helpful if you want the student to enter data or perform spreadsheet calculations without having to leave Möbius, or if you want to customize grading for multiple numeric responses.
Spreadsheet questions can allow for automatic or manual grading (check out Grading details for spreadsheet questions).
TIP: Check out Author content with a spreadsheet component for details on adding an ungraded spreadsheet component.
A read-only static rendering of the student's response is shown to students and instructors in both the Gradebook and in student feedback after the assignment submission.
TIP: You can now include algorithmic variables in your spreadsheet question! The use of variables from the Algorithm section is different in spreadsheets; check out Formulas and functions in the spreadsheet for details.
TIP: All questions are authored using the Question Editor. Check out Author a question to learn how to access the Question Editor.
To author a spreadsheet question
To author a spreadsheet question from the Question Editor:
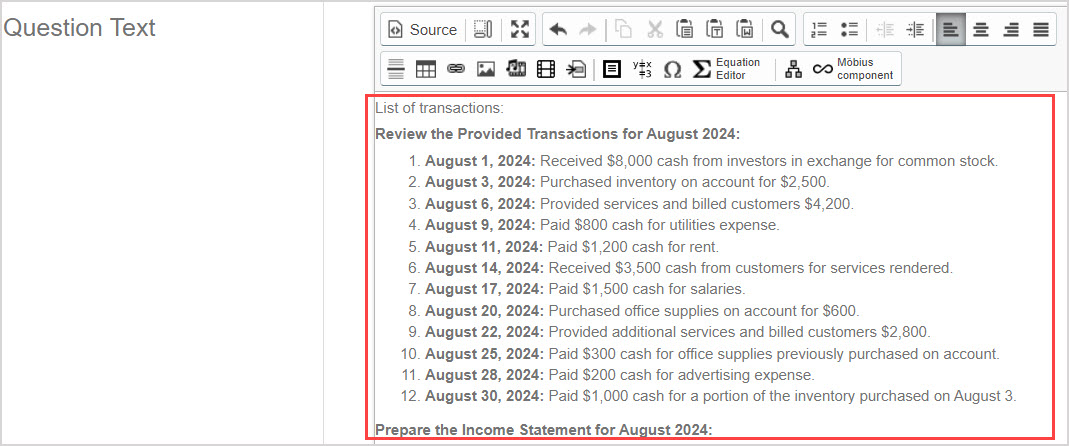
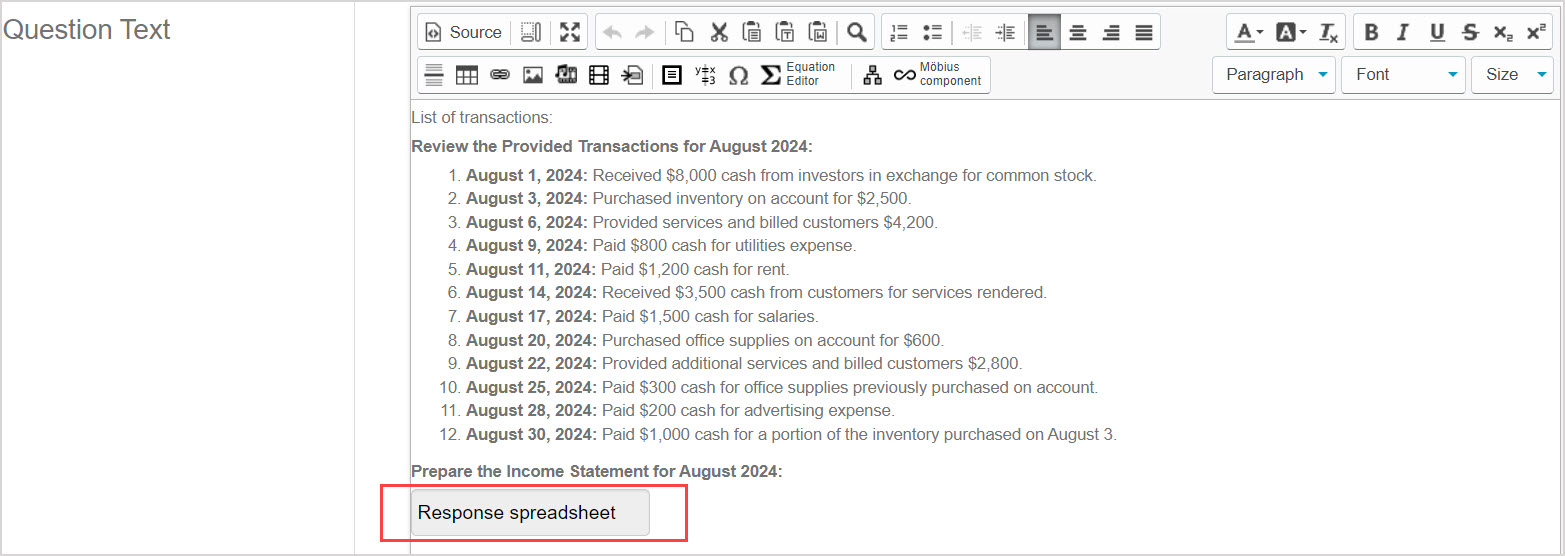
Enter the question statement in the Question Text pane of the Question Editor.
TIP: Check out Use the Visual Editor for details on how to use this toolbar to the fullest to control the visual appearance of your spreadsheet question text.

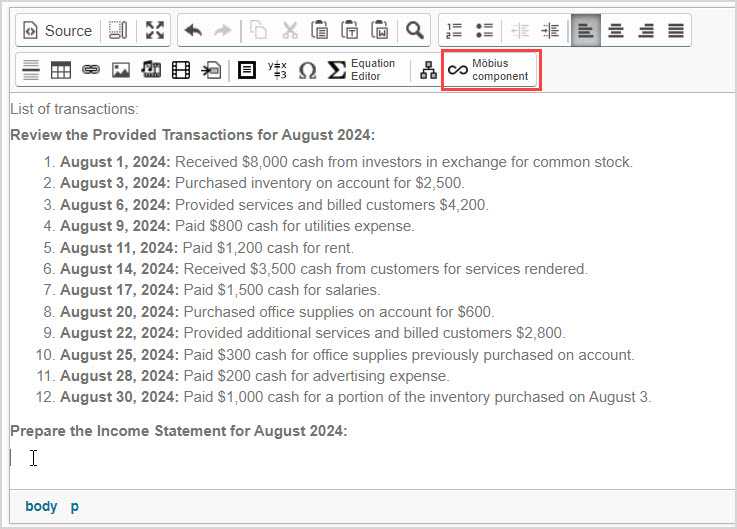
Click Möbius component to select the type of student response for this question.
NOTE: A question can have multiple parts, with each question part using a different type of component. Example — A question could contain two components; the first part using a document upload student response, and the second part a multiple choice student response component.
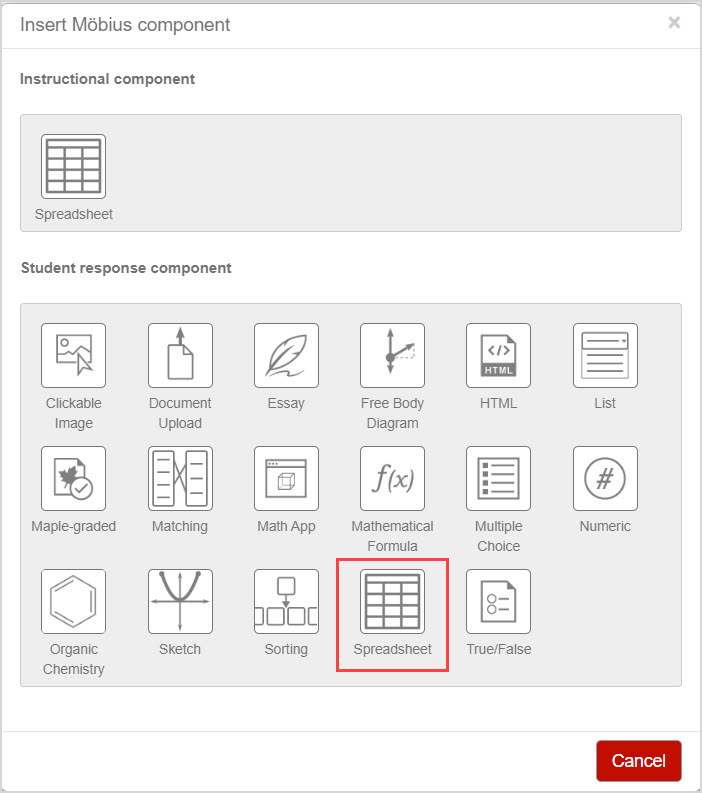
Click Spreadsheet from the list of student response components.
Assign a weight to the response. The default weighting is 1.
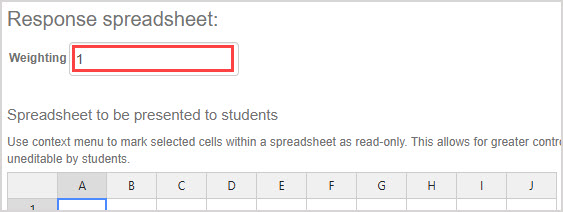
TIP: The weight of the component can be any integer greater than 0, and is calculated proportionate to the total of all weights across the question. Example — A question with two components could have the first weighted as 2, and the second weighted as 4. This means that the second component will be worth twice as much as the first when calculating the total grade for the question.
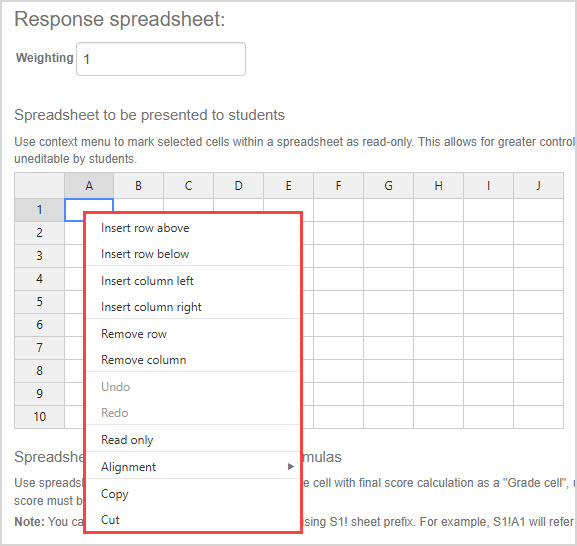
Right-click on a spreadsheet cell to open the context menu. You can do any of the following:
- Insert row/column — Add a row or column to the table, either before or after the selected row or column.
- Remove row/column — Delete the selected row(s) or column(s) from the table.
- Undo/Redo — Undo the most recent change to the table, or redo the most recent change that was undone.
- Read only — Lock the contents of the selected cell(s) so they can't be changed by students answering the question.
- Alignment — Change the horizontal or vertical alignment of text within the selected cell(s).
- Copy/Cut — Copy or cut the contents of the selected cell(s).
IMPORTANT: The context menu actions can be applied on the Spreadsheet to be presented to students and on the Spreadsheet to provide optional grading formulas.
TIP: You can also use the keyboard shortcuts Ctrl+X, Ctrl+C and Ctrl+V to cut, copy and paste the contents of the selected cell(s).
NOTE: There is a limit of 20 rows and 20 columns to ensure the spreadsheet remains navigable for users. Students won't have the options of inserting or deleting rows or columns when they attempt the spreadsheet question - check out Navigate a spreadsheet to see what's available to students.
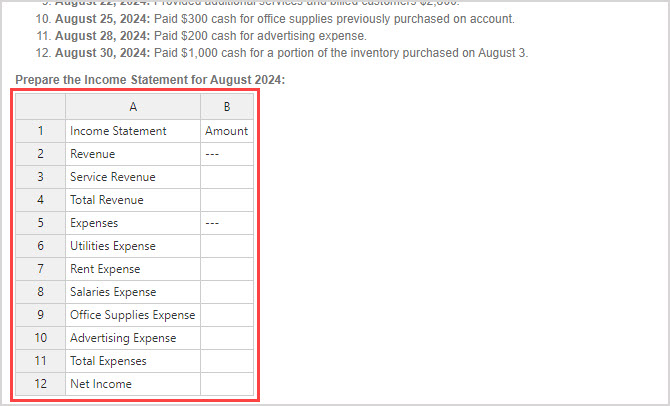
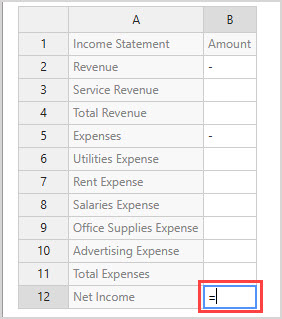
For the Spreadsheet to be presented to students, enter text or formulas into cells as desired.
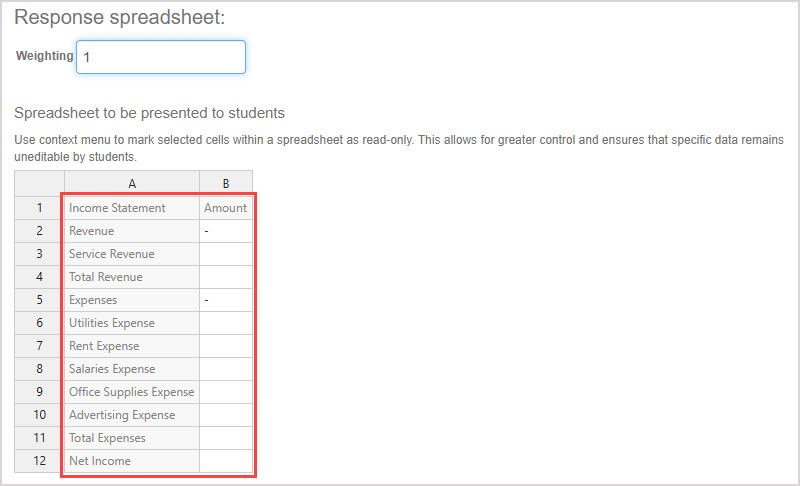
TIP: Use the Read only option in the context menu to prevent students from changing the cells.
NOTE: Check out Formulas and functions in the spreadsheet for more details on adding a formula to calculate the contents of a given cell.
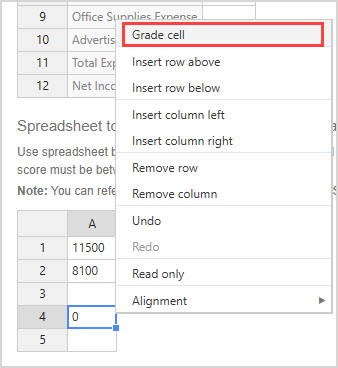
For the Spreadsheet to provide optional grading formulas, add formulas to calculate the correct answer and the student's grade, then use the context menu to mark the single cell containing the student's grade as the Grade cell.
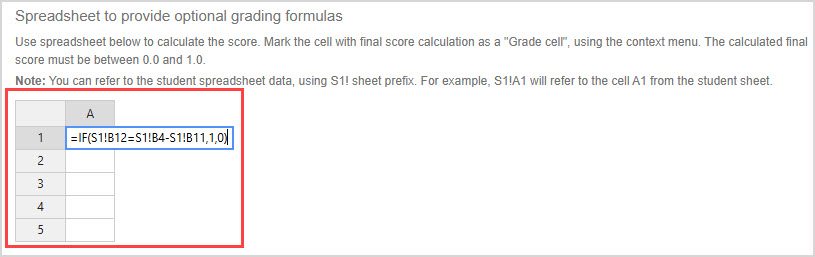
NOTE: To enable automated grading, select the cell in the Spreadsheet to provide optional grading formulas that calculates the student's grade, then right click and select Grade cell from the context menu. You must mark one cell as a Grade cell in order to enable automated grading.
NOTE: Check out Grading details for spreadsheet questions for more details and examples on automated grading.
Click Insert to add this student response component to the question.

The component is inserted into your question.
Click Preview to trial your new question to ensure that it behaves as expected.

TIP: You first have to click the save icon if you're creating this question from within an Activity Editor. After the question has been saved, you can then click the preview icon
 to ensure that your new question behaves as expected.
Click Save to save your new question. Your new question is now stored in the Questions pane of the Content Repository.

TIP: Click the save iconif you're creating this question from within an Activity Editor. This saves your question to the activity and the Content Repository.
Formulas and functions in the spreadsheet
To enter a formula to calculate the value of a given cell, double-click on the cell and then type the formula starting with an equal sign (=):
Cell references are written as either an upper-case or lower-case letter followed by a number (Example — write A2 or a2 to reference the value in the first column and second row).
Use a colon between two cell references (Example — A1:A10) to denote the range of cells between them.
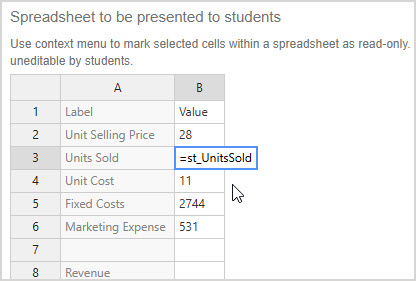
IMPORTANT: If you follow these rules when defining Möbius algorithmic variables in the Algorithm section of your question, you can use the variables in your spreadsheet question:
- The name of any variable that will be visible to students must be prefixed with st_ (Example — $st_UnitsSold).
- Only those student-facing variables will work in the Spreadsheet to be presented to students.
- The name of each student-facing variable can be found by a student when they attempt the question (by checking the cell formula).
- Variables that don't start with st_ are hidden from students, but can be used in the Spreadsheet to provide optional grading formulas section (Example — a variable named $ans1 won't be visible to students but can still be used for grading).
- In any cell formula, you must use the name of the variable without the dollar sign (Example — enter =st_UnitsSold as the cell formula).
The two spreadsheets defined in question authoring are updated by Möbius when grading, and are referenced as follows:
- S1— the completed Spreadsheet to be presented to students that also contains the student's response, and;
- S2— the completed Spreadsheet to provide optional grading formulas.
To reference a cell from one spreadsheet (Example — B2 in the student's response) in a different spreadsheet, enter the name above followed by the cell reference (Example — S1!B2).
NOTE: Check out the documentation for built-in functions for a full list of pre-built functions available with the spreadsheet component.
NOTE: The spreadsheet component supports a number of volatile functions. Any change to a spreadsheet that uses a volatile function triggers recalculation of all cells (not just those related to or using the function), and so these functions should be used with care. Check out the documentation for volatile functions for details and a full list of volatile functions.
Grading details for spreadsheet questions
Spreadsheet questions are automatically graded by checking all calculations in S1 (the spreadsheet presented to the student and containing their response), and then re-calculating each cell in S2 (the spreadsheet for grading). Then the value of the Grade cell, as marked in S2 during question authoring, is returned as the student's grade.
IMPORTANT: The value of the Grade cell (when calculated during grading) must always be between 0.0 and 1.0.
To mark the Grade cell, select the cell in the Spreadsheet to provide optional grading formulas section that calculates the grade, then right click and select Grade cell from the context menu:
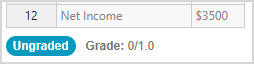
NOTE: If there isn't a cell marked as the Grade cell, then the student response remains ungraded, and the question will require manual grading by an instructor.
Check out Manually grade a spreadsheet question for more details.
Example formulas for the grade cell
The IF function is the most commonly used function for grade calculation:
- IF(logic_test, value_if_true, value_if_false)
The first argument needs to be a logical statement that can be determined to be either true or false with the information given in the spreadsheets (Example — S1!A1=S2!A1). If the statement is true then the second argument is evaluated as the result of this function, and if the statement is false then the third argument is evaluated as the result of this function.
NOTE: Check out the documentation for built-in functions for a full list of pre-built functions available with the spreadsheet component.
Below are some examples of common grading formulas that can be used for the grade cell:
- Using the IF function to check if the student entered 3 in B4 of their spreadsheet:
=IF(S1!B4=3,1,0)- Rounding the student's response in B4 to check it matches π to 2 decimal places:
=IF(ROUND(S1!B4,2)=ROUND(PI(),2),1,0)- Combine the part grades calculated in A1, A2, A3 and A4 of the grading spreadsheet (and part grades are between 0.0 and 1.0):
=AVERAGE(A1:A4)TIP: You may also use other cells of the Spreadsheet to provide optional grading formulas section to perform intermediate calculations. Example — if S2!A1 is used to calculate the correct answer the student needs to enter in one of the cells S1!B4, then you can set S2!A2 to be the Grade cell with the following formula: =IF(S1!B4=S2!A1,1,0)