Create a class
These system roles have permission to create a class:
- Administrators
- Instructors + create
- Instructors
New classes are created from the System Homepage.
TIP: You can also create a child class of any class that you're enrolled in as an instructor. This child class inherits the content contained in a parent class. The class used to create the child class is then considered a parent class. Check out Create a child class.
TIP: Check out Clone my LMS course to learn about child classes that result from the cloning of LMS courses.
TIP: You can define your new class as a featured class so that the content from your class can be inherited by a newly-created class within your organization upon creation of that new class. Selecting to inherit content from a listed featured class means that you are creating a child class of a featured class. Check out Create a featured class.
Once you've created your class, you can then review and edit its details at anytime (check out Edit a class).
The Class Link is available after you've created your class.
TIP: Selecting All students or Students with Class Link from the enrollment settings (check out Manage student enrollment) and then sharing your Class Link with your students enables them to self-enroll into your class. Check out Share my Class Link to learn how to access and distribute your Class Link.
Create a class
To create a new class:
Click Class Manager on the System Homepage.
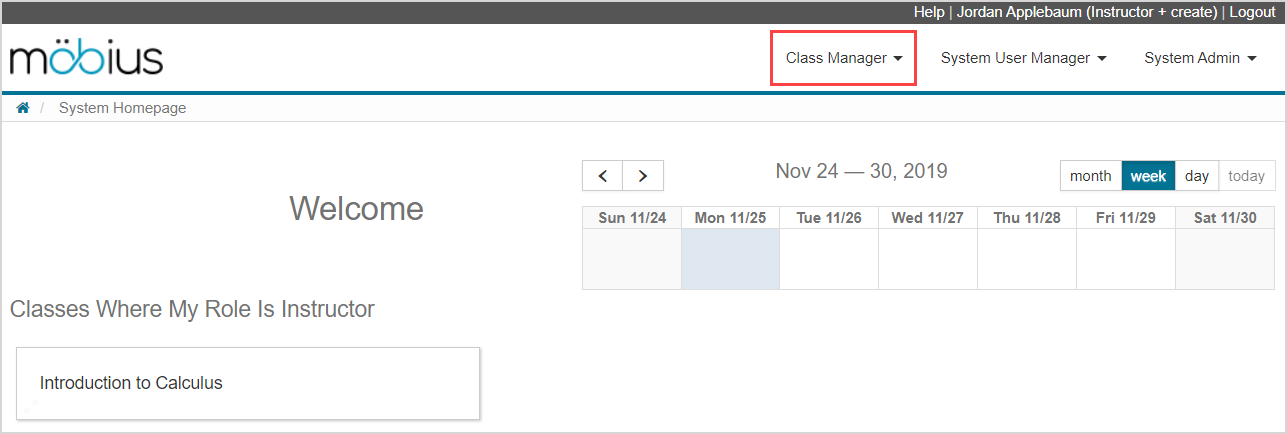
TIP: If you're an instructor that isn't yet enrolled in any classes (as a student, instructor, or other role), you'll be able to:
Click Add Class from your empty System Homepage.
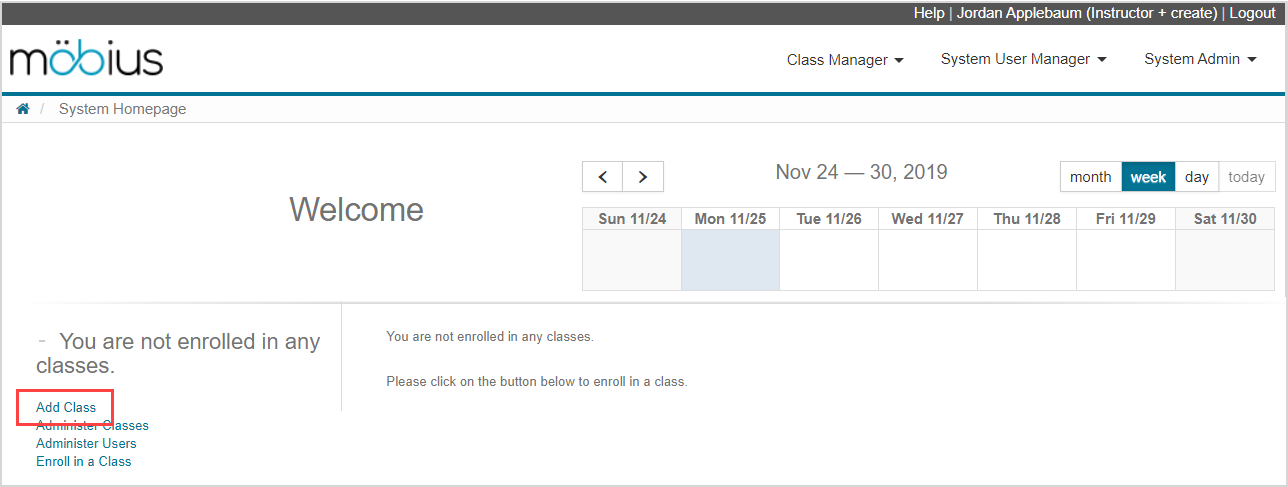
Resume at step 3 of To create a class.
Click Add Class.
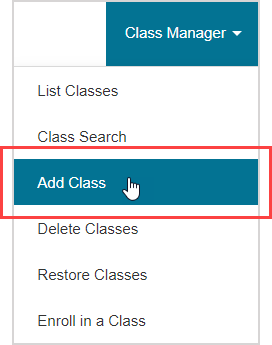
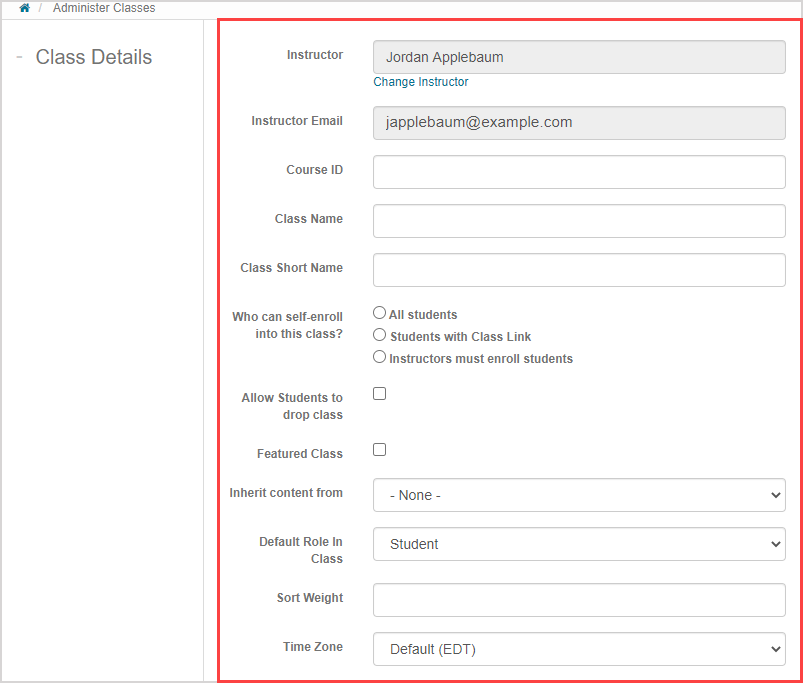
Define the class details for your new class:
| Class details fields | Description |
|---|---|
| Instructor | Instructor assigned to the class is the instructor user profile being used to create the class. This is the primary instructor of the class and is the instructor that's listed on the Class Homepage. Click Change Instructor to assign a different user as the primary instructor (check out Change the primary instructor).
Any user in your organization can be assigned as the instructor. Example — A student user (with the system role of a student) could be made the instructor of a tutorial class. This student will have instructor privileges only for the class they are assigned to teach. All other classes they are enrolled in remain as student privileges only. |
| Instructor Email | The email address autofills as a read-only entry for the instructor assigned to the class. This email address is displayed on the Class Homepage. |
| Course ID | Identifier for the class. Often a combination of letters and numbers to identify the class. Example — INTRO101 |
| Class Name | Identifier for the class. Appears on System Homepage and class lists within your organization. Must be unique within your organization. Example — Introduction to Calculus NOTE: This is a required field. |
| Class Short Name | A shortened class name that is displayed only when space is limited. Example — Intro to Calc |
| Who can self-enroll in this class? | Select the radio button for how students are able to enroll into your class. Choose from:
NOTE: This is a required field. TIP: Check out Manage student enrollment for more information on student enrollment settings. NOTE: This setting also determines whether your class will appear in a student’s class search during self-enrollment. The class will appear listed as an available class only if the All students option is selected. |
| Allow Anonymous Access | Option is only visible if it's made available to your organization by DigitalEd's Support Team. If anonymous access is available to your organization, choose from: Enabled — Anonymous users can access your class's activities on the System Homepage without logging in to Möbius. Disabled — Anonymous users can't access your class's activities on the System Homepage. |
| Require Student Class License | The Require Student Class License check box will be visible if your organization has student licensing enabled. You can then select or deselect this check box depending on your permissions. |
| Allow Students to drop class | Enabled — The Drop Class button is made visible on the students' Class Homepage and students can drop the class at anytime. Disabled — The Drop Class button isn't visible and students can't drop the class without approval by an instructor or administrator. |
| Featured Class | Enabled — The class appears in the Inherit content from drop-down list so that it can be used to create child classes. Disabled — The class isn't available in the Inherit content from drop-down list and can't be used to create child classes. NOTE: Defining your new class as a featured class makes it a parent class because its content is made available to be inherited by other classes. Check out Create a featured class. |
| Inherit content from | You can select to inherit content from the drop-down list of other classes defined as featured classes. Selecting to inherit content from a featured class means that you are creating a child class of a featured class from within your organization. TIP: Check out Create a child class. |
| Default Role In Class | Choose the default class role for a user who self-enrolls into the class. NOTE: If self-enrollment is enabled, the user can self-enroll into the class and will automatically receive this role regardless of their system role. Choose from:
NOTE: Your organization may have other custom roles available that you can select as the default class role. |
| Sort Weight | Prioritizes the arrangement of your classes on your System Homepage. The lower the number, the closer the class is to the top of the class list on the System Homepage. Acceptable sort weight values range from -10 000.0 to 10 000.0. Example — Class A with a sort weight of 1.0 will appear first in the class list. Class B with a sort weight of 2.0 will appear after Class A. Class C with a sort weight in between Class A and Class B (1.5) will be placed between those two classes on the System Homepage. If Class C were to instead have a sort weight less than Class A (-1.0), it will be placed in the first position on the System Homepage. |
| Time Zone | The system-wide time zone is the default class time zone. You can change it to a different time zone if needed. The class time zone interacts with the start dates and end dates for your class content. Example — EDT Eastern Daylight Time America/ Toronto GMT -5:00 |
TIP: You can change these settings for your class at anytime. Check out Edit a class.
Click Submit to save your new class

A success message appears after your class has been created. You can also review the details of your new class.
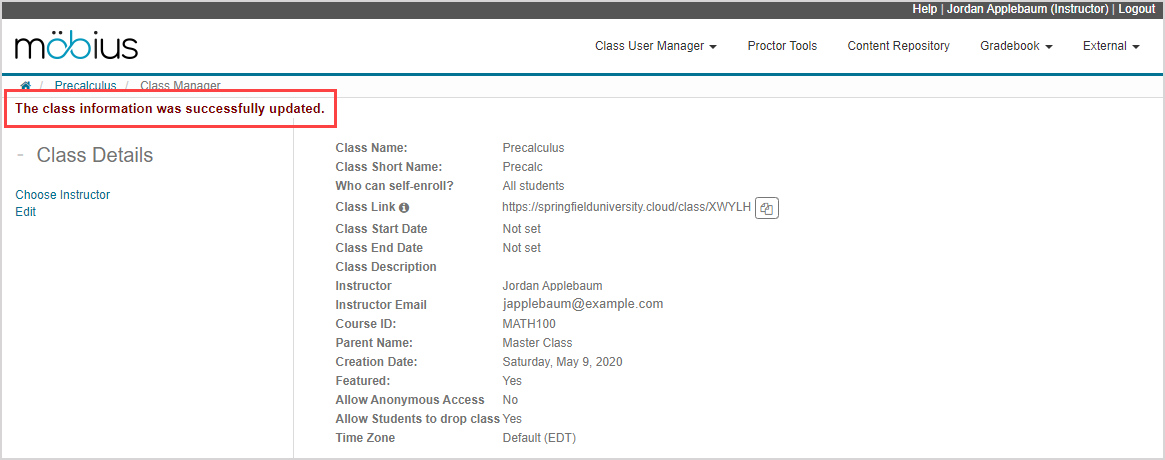
TIP: The Class Link for your new class is available upon creating the class and can be distributed to your students. Check out Share my Class Link.
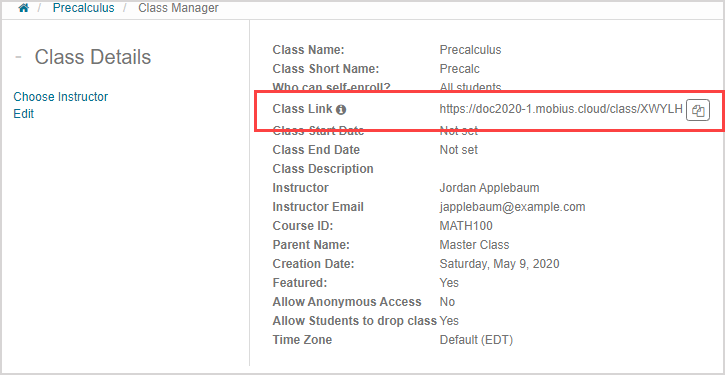
TIP: Click Edit in the Class Details pane to modify your new class.
Your new class now appears on the System Homepage in the class list of Classes Where My Role Is Instructor.

TIP: Check out Enroll users into my class to learn about enrolling students into your new class.
What's next?
Now that you've created a class, you're ready for:
