Bulk upload of student responses to document upload questions
Document upload questions can be configured during authoring to generate a unique document code.
Many students may send you their responses (Example — by email) to a document upload question in the form of a document that references the document code.
NOTE: The student's document code is a unique numeric, alphabetic, or alphanumeric character set that was generated for them during their document upload question attempt (after they've clicked Generate Code within the question).
You'll then save the students' documents locally on your computer so that they can later be referenced by a .zip file.
A .zip file must be created to bulk upload multiple document responses simultaneously to Möbius.
You can include a grade for the document responses in the .zip file (which is automatically pushed to the Gradebook) or you can navigate to the Gradebook after the upload to manually grade each response.
TIP: You can also perform individual document uploads of student responses which you can then manually grade in the Gradebook. Check out Upload a student response to a document upload question.
NOTE: Students will upload their document responses to Möbius themselves from within the activity if the document upload question is configured as direct upload.
Create a .zip file for bulk document uploads
To create the .zip file that you'll use to bulk upload your students' document responses:
Create a .csv file with the following attribute headings:
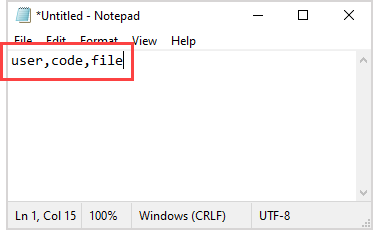
- user — Unique student identifier.
- code — Document code that's being referenced by the student's response.
- file — File name of the document response as it appears when saved locally on your computer.
NOTE: Unique student identifiers can be a student's login, email, or student ID. Any of these unique student identifiers can be used, but the same type of identifier must be used within the same .csv file. Example — All students listed in the .csv file are identified with their login identifiers.
NOTE: The grade attribute heading is optional. Exclude the grade attribute heading if you plan on manually grading the responses from the Gradebook. Include the grade attribute heading if you've already assigned grades to the responses from outside Möbius.
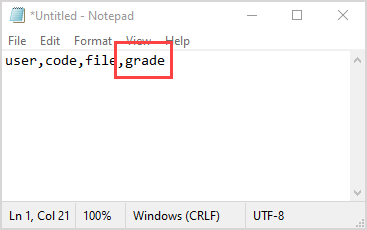
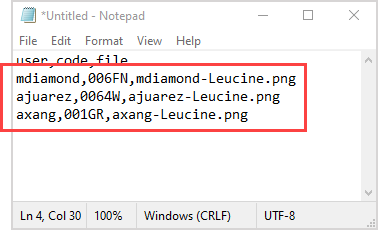
Enter your student data for each attribute field.
NOTE: Define the grades achieved for each student if the grade attribute is included in your .csv file. The entered grade should be the grade that the student achieved out of the total achievable grade for the activity. Example — 3 would be the grade value for an attempt that achieved 3 marks out of 4 possible marks.
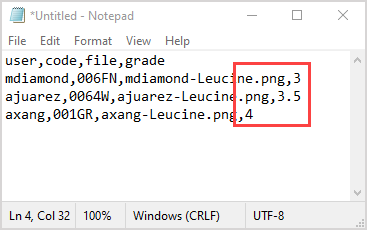
Save your .csv file as files.csv.
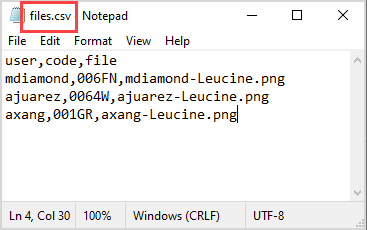
IMPORTANT: The name of your .csv file must be called files.csv in order for it to be correctly referenced by Möbius during the upload.
Package your files.csv file as a .zip file. The .zip file can be named as needed.
Copy your students' documents into the .zip file.
Your bulk document upload file is now ready to be uploaded to Möbius.
Bulk upload of student documents
To bulk upload your students' document responses (and grades, if defined) contained in the .zip file:
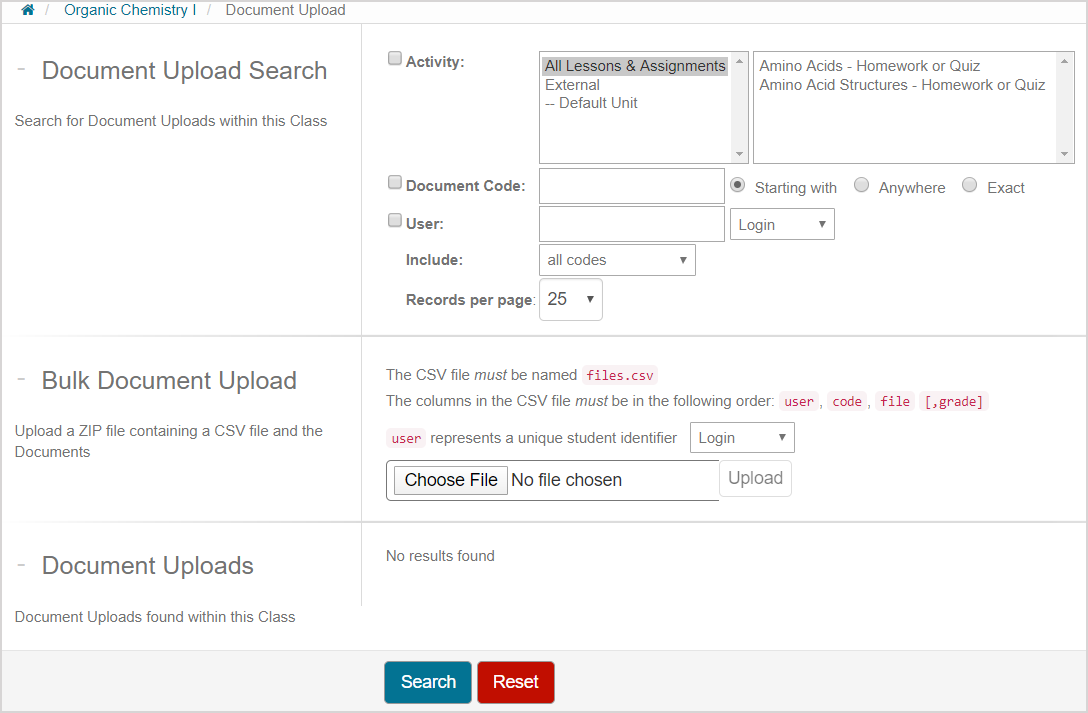
Click External on the Class Homepage.

Click Document Upload.
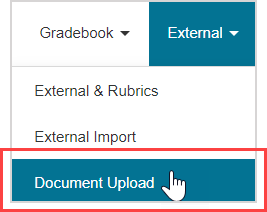
Select which unique student identifier was used for the user attribute from the drop-down list in the Bulk Document Upload pane.

- Login
- Student ID
Click Choose File.

Select your .zip file and click Open.
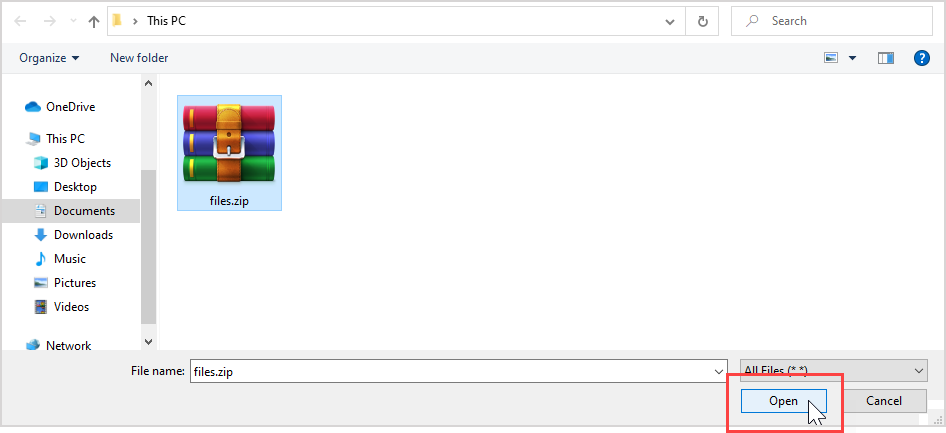
Click Upload.

A summary of the defined attribute values and student documents that you're about to upload is displayed.
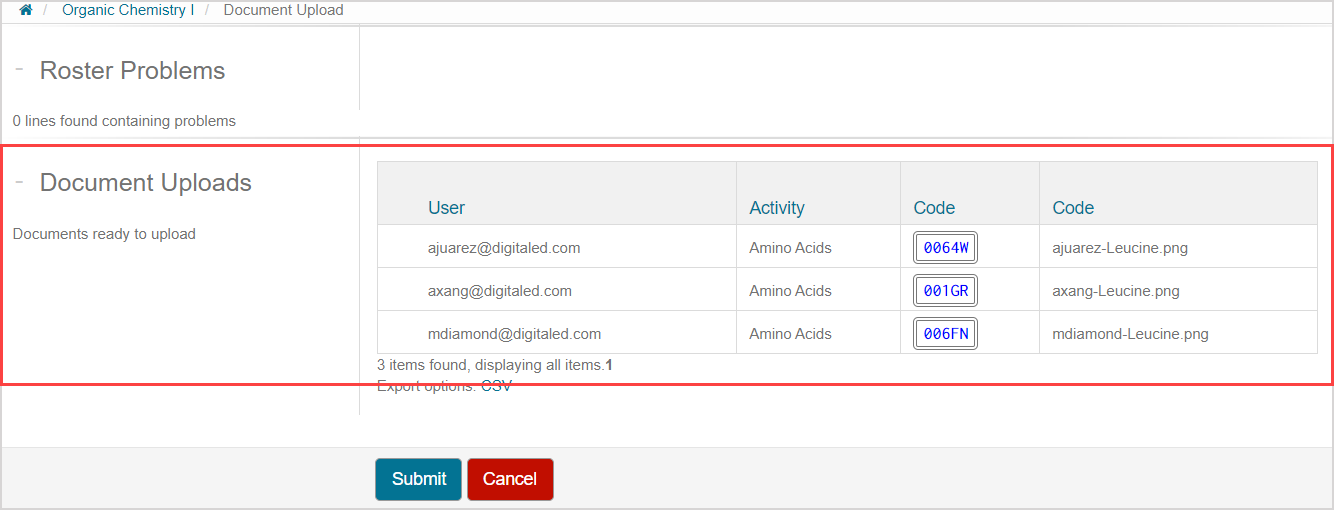
NOTE: A Grade column will be visible if you defined the grade attribute in your .csv file.

NOTE: You'll have an error with the upload if you've entered an attribute value incorrectly or forgot to include the actual student document files in your .zip file. Review your .csv file for attribute value errors and return to your .zip file to ensure that the student documents are copied over (even though they may be listed in the .csv file, they may not actually have been copied over to the .zip file).
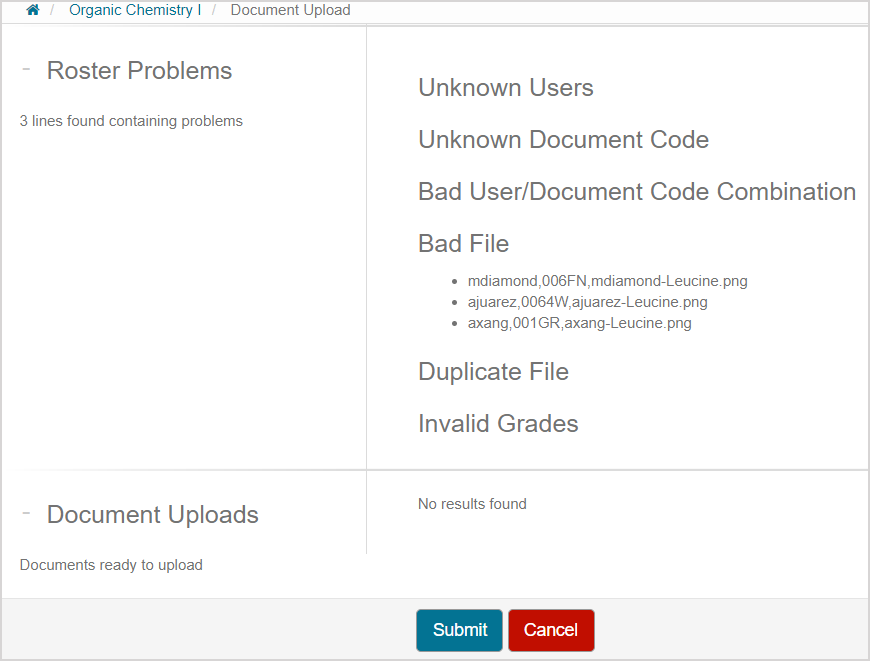
Click Submit to confirm the upload.

You're returned to the Document Upload page. Your student document responses have been successfully uploaded.
NOTE: Uploading a .csv file (within the .zip file) with the grade attribute will automatically push the defined grades to the Gradebook, so you don't need to manually grade the document responses in Möbius. Therefore, ignore step 10.
Navigate to the Gradebook to perform manual grading of each document response.