Manage slides with the Interactive Narrative Editor
Jump to section
Managing the slides of your interactive narrative is performed using the Interactive Narrative Editor.
This editor can be accessed from either the Content Repository or the Lesson Editor (check out Author an interactive narrative to learn how to access this editor).
With the Interactive Narrative Editor, you can perform the following slide management tasks:
- Create a new slide
- Add content to a slide
- Edit slide layout
- Set a start screen
- Apply a theme
- Rename a slide
- Re-arrange slides
- Delete a slide
TIP: Check out the following help topics to further enhance your interactive narrative authoring:
Create a new slide
You can create a new slide for your interactive narrative in four ways using:
- The default template
- A selected template
- Content import
- Cloning
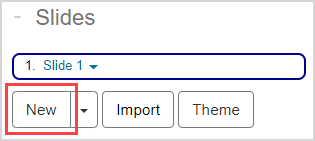
Default template
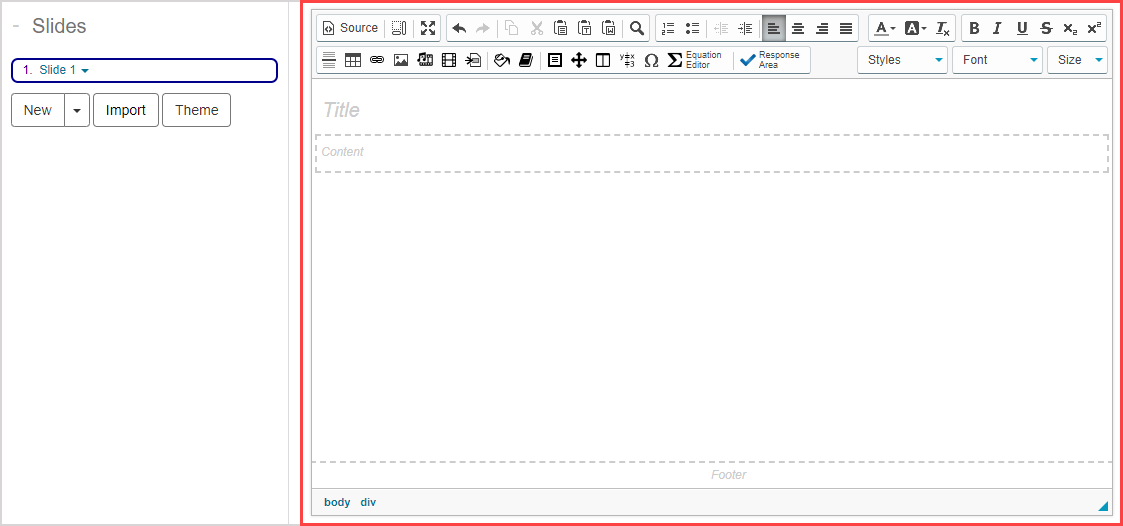
Click New from the Slides pane to create a new slide that uses the default template.
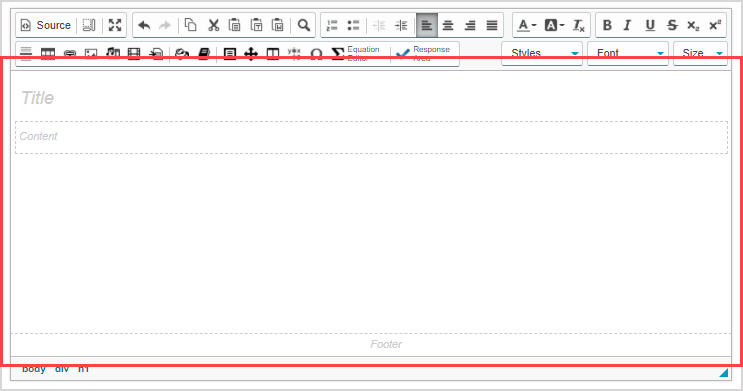
NOTE: The default template consists of a:
- Title element
- Content element
- Footer element
Your new slide is added to the end of the slide list.
Selected template
Click the option arrow of the New button from the Slides pane to reveal the slide template menu.
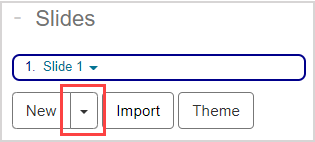
Click on the slide template that you want to use for your new slide.
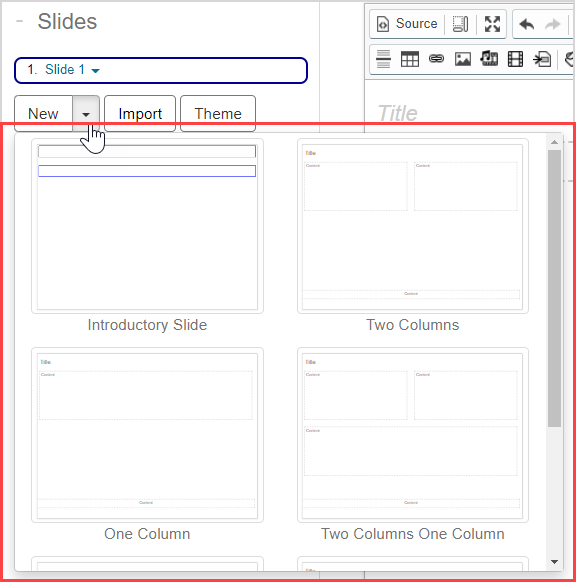
NOTE: This slide template menu displays all of the contents of the Slide Templates folder from your Content Repository (this includes your custom slide templates).
Your new slide is added to the end of the slide list.
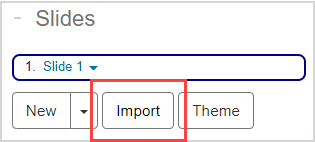
Content import
Click Import from the Slides pane to create a new slide that's structured around imported content.
IMPORTANT: When importing content that has the shared icon (Example — inherited or shared content), it's strongly recommended that you first clone this content into your class before importing it into an activity. Cloning prevents any changes made to the original content by the original author from automatically propagating into your activity without notification. Cloning creates a copy of the inherited or shared content that you can then import into your activity without having to worry about the content changing unexpectedly. Check out Clone content.
Select the check box of the piece of content you want to add to the new slide and click Import.
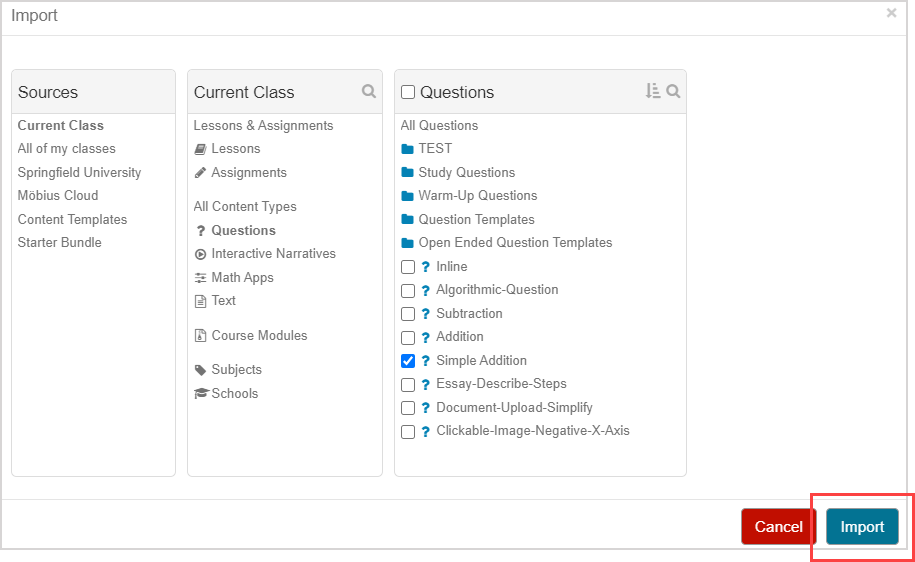
TIP: You can select more than one check box.
Your new slide contains the selected content and is added to the end of the slide list.
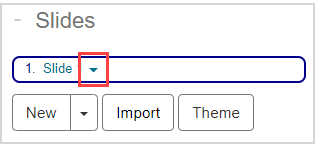
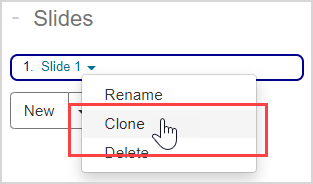
Cloning
Click the option arrow of the slide you want to clone to reveal the slide editing options.
Click Clone to copy the selected slide.
A clone of the selected slide is added in the position below the original slide in the slide list.
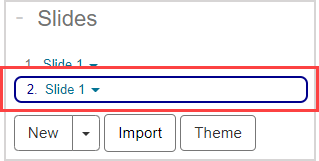
NOTE: The slide clone is an exact copy of all aspects of the original slide. Example — If the original slide has audio, transitions, and an algorithm, the slide clone will have the same audio, transitions, and algorithm applied.
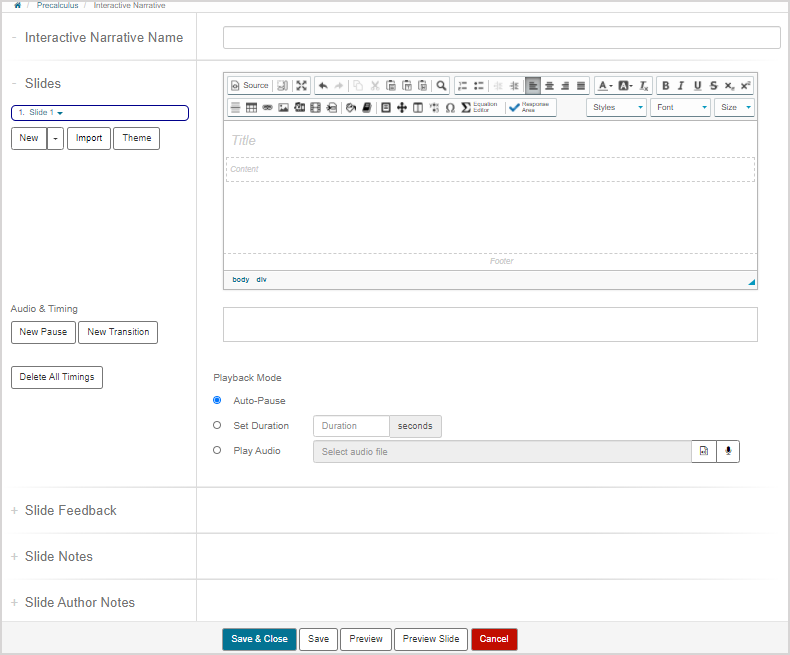
Add content to a slide
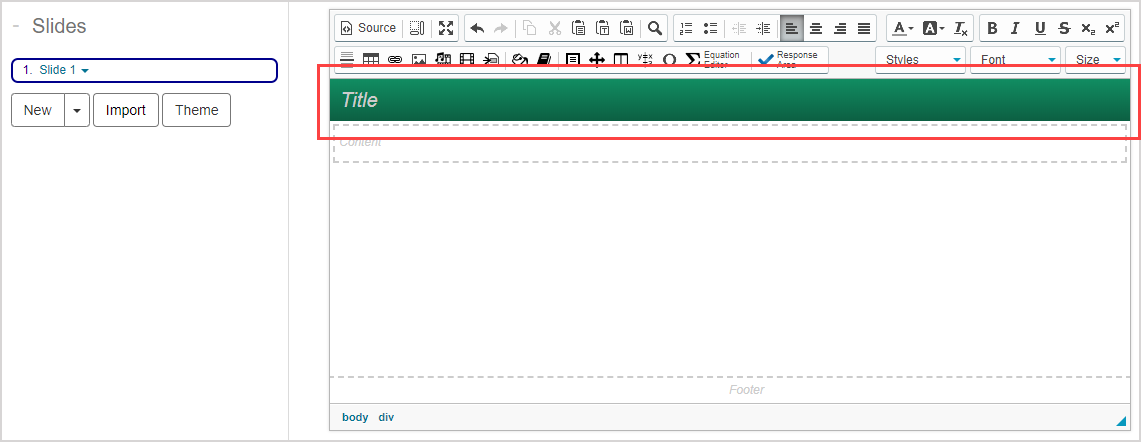
Use the provided Visual Editor to author a slide on the slide editing page.
TIP: Check out Use the Visual Editor for details on how to use this toolbar to the fullest to control the visual appearance of your slide.

NOTE: The Interactive Narrative Editor supports all Möbius question types.
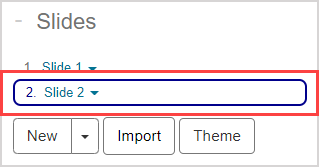
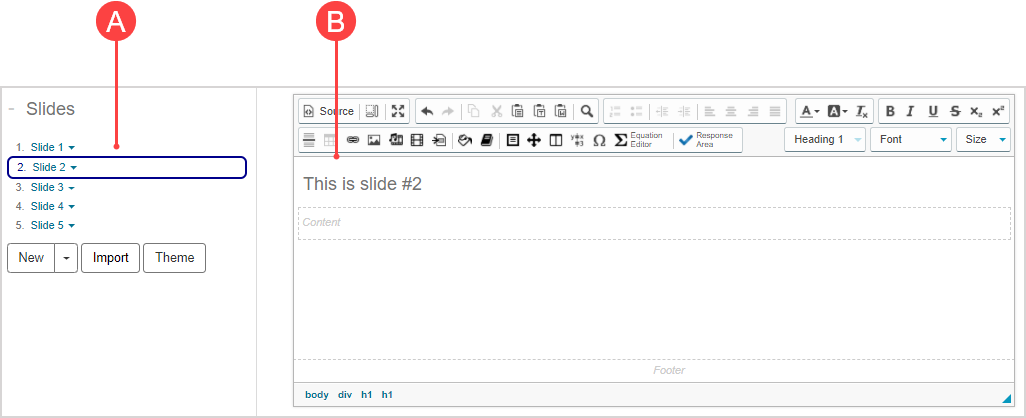
NOTE: The slide that's selected from the slide list is highlighted with a (A) border and also displayed in the Interactive Narrative Editor's (B) editing window.
Edit slide layout
In addition to the functionality of the Question Editor toolbar, you can hover your cursor over a slide element to reveal a layout editing menu.
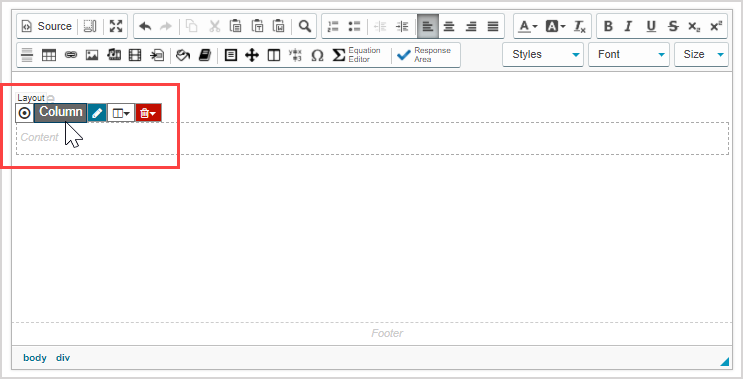
Depending on the selected element, you might have the following editing options:
- Click
 to select the element that you want to add slide transitions to.
TIP: Check out Add slide transitions to an interactive narrative for help with slide transitions.
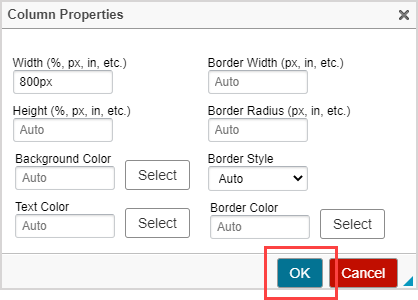
- Click
 to edit the styling of the element (Example — width, background color, border style, etc.).
- Make your styling edits in the Properties window that appears and click OK.
TIP: You can also double click on the element name  to access the Properties window. Example — Element names could be Column, Theorem, or other elements that have been included in the slide's layout.
- Click
 to edit the arrangement of the selected element and add elements to the selected element.
- Choose from:
| Options | Description |
|---|---|
 Column Column | Add a new element to the left of the selected element. |
Column | Add a new element to the right of the selected element. |
Column Group | Add new element above the selected element. |
Column Group | Add new element below the selected element. |
| Line (Top) | Add a text line at the top of the element. |
| Line (Bottom) | Add a text line to the bottom of the element. |
| Line (Above) | Add a text line outside and above the element. |
| Line (Below) | Add a text line outside and below the element. |
| Match Height | Make all elements in the same row have the same height. |
| Respace Row | Make all elements in the same row have the same width. |
- Click
 to delete the element.
- Then click Confirm to approve the element deletion.
- Or, click Cancel to keep the element.
Set a start screen
You can specify the start screen—or preview image—for your interactive narrative that will be displayed when your presentation is loaded, but before Play is pressed by the student.
NOTE: Your interactive narrative requires at least one transition for a start screen to be manually set, otherwise it defaults to the first slide or the 15 second mark of your interactive narrative (if you've authored your slide using the Set Duration or Play Audio playback mode). Check out Add slide transitions to an interactive narrative.
To set a start screen:
Right-click the transition marker in the waveform bar of a selected slide that represents the point in time that you want to set as the start screen.
![]()
Click Start Screen.

This transition marker is assigned as the start screen and indicated with a border around the transition marker.

Apply a theme
An applied theme affects the visual design of all slides within the interactive narrative.
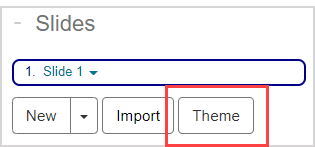
To apply a theme to your interactive narrative:
Click Theme.
Click-and-drag the desired theme from the Available Themes column to the Applied Themes column.
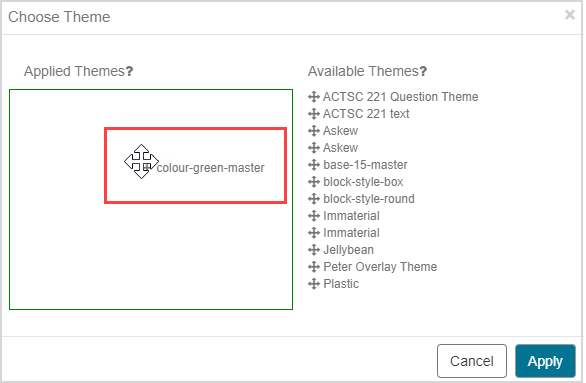
TIP: You can apply multiple themes to your interactive narrative.
TIP: Click-and-drag any unwanted applied themes from the Applied Themes column back to the Available Themes column. Themes are applied in the order that they appear in the Applied Themes column.
Click Apply.
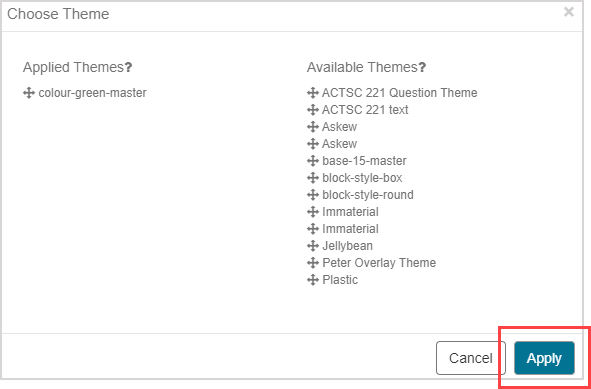
The selected theme is applied to every slide in your interactive narrative.
NOTE: Custom CSS in the Custom CSS pane of an interactive narrative will override the features of a theme. Example — Adding a font size in the Custom CSS pane of the Interactive Narrative Editor will override the CSS font size of a theme. Check out Use additional options of the Interactive Narrative Editor.
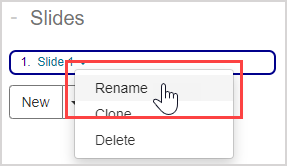
Rename a slide
To rename a slide:
Click the option arrow of the slide to reveal the slide editing options.
Click Rename to edit the name of the selected slide.
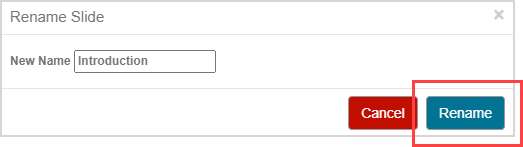
Define a new name for the slide and click Rename.
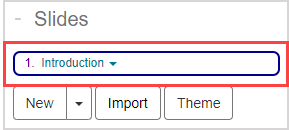
The selected slide now displays its new name.
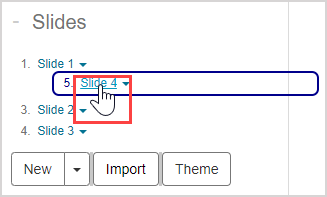
Re-arrange slides
Click-and-drag the slide in the slide list to re-arrange the slide sequence in the interactive narrative.
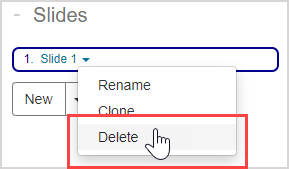
Delete a slide
Click the option arrow of the slide to reveal the slide editing options.
Click Delete to delete the selected slide from the interactive narrative.