Create a rubric table
You can create a rubric table to support the grading of external activities.
Rubric table — A scoring tool that establishes the grading criteria for an external activity.
Rubric tables help to communicate the expectations for an external activity and are highly customizable.
Once you've created a rubric table, you can then apply it to an external activity.
External activity — An activity that was completed outside of the Möbius platform (Example — a quiz completed on paper, an oral presentation, etc.).
IMPORTANT: A rubric table can only be applied to external activities (not Möbius lessons or assignments). Rubric tables can only be applied to an external activity before student grades are entered and saved for the external activity (Example — you can't apply a rubric table to an existing external activity that already has student grades recorded in it). Check out Apply a rubric table.
NOTE: Rubric tables are inherited by child classes.
TIP: Have you already created a rubric table and want to return to it to preview or edit it? Check out Access rubric tables.
To create a rubric table
To create a rubric table to apply to external activities:
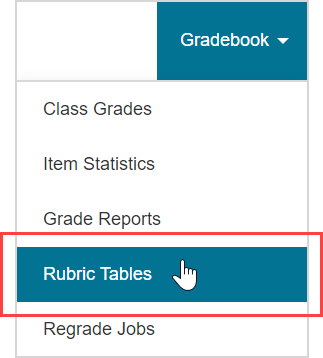
Click Gradebook on the Class Homepage.

Click Rubric Tables to use the Rubric Table Editor.
Click New Rubric Table to create a new rubric table from the Rubric Table Editor.

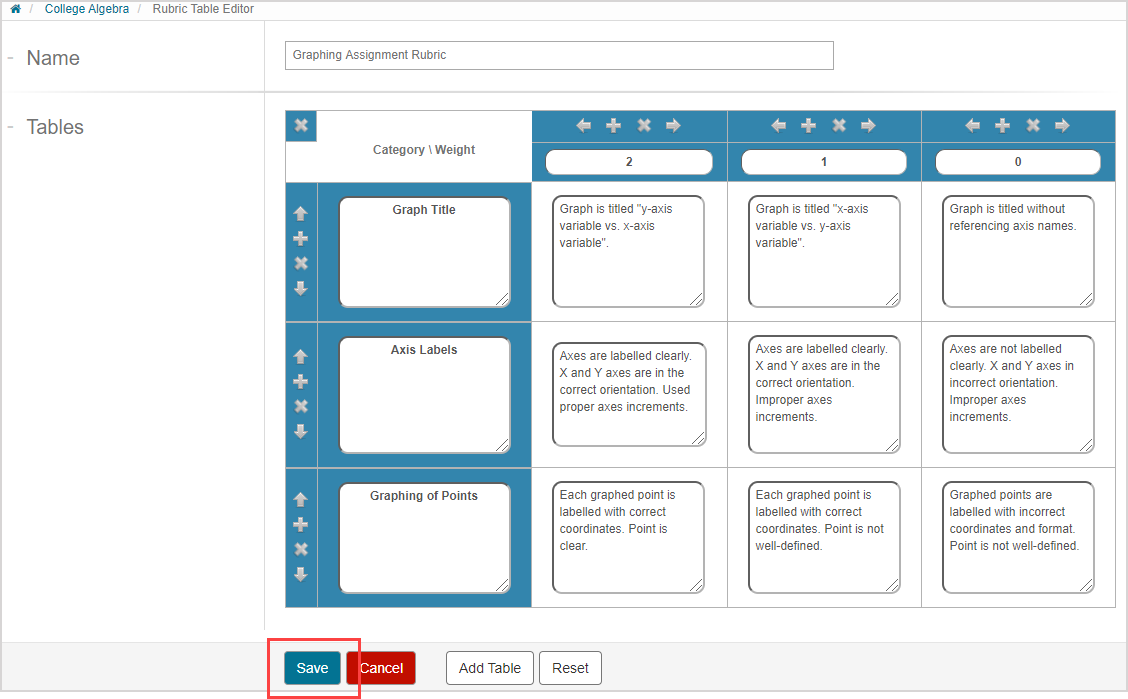
Define a name for your new rubric table.

NOTE: You'll receive an error message if you try to save your rubric table without a name. Click OK to escape the error message and name your new rubric table.

Define the name of each grading category.
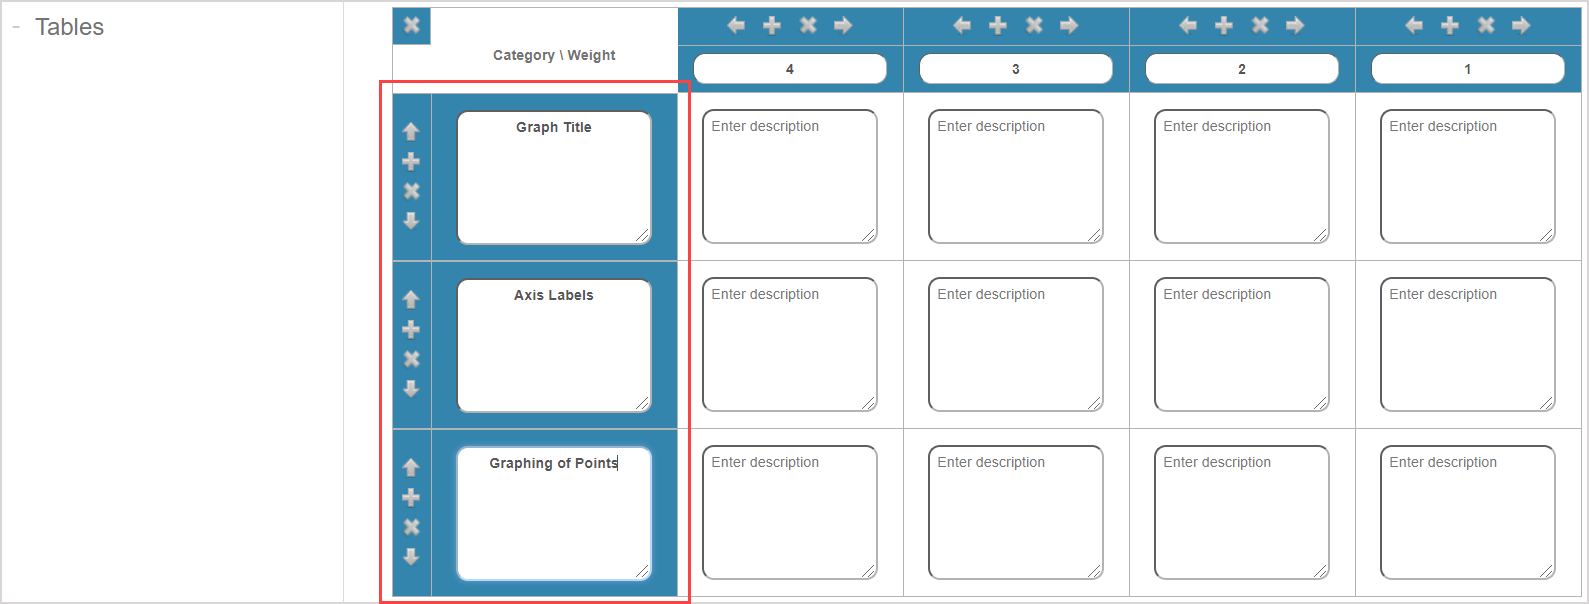
NOTE: You'll receive an error message if you try to save your rubric table without defined grading categories. Click OK to escape the error message and define your new rubric table grading categories.

TIP: Use the rubric table controls to delete, add, and rearrange categories. Check out the Rubric table controls section of this help topic.
Define the numerical value of each grading weight.
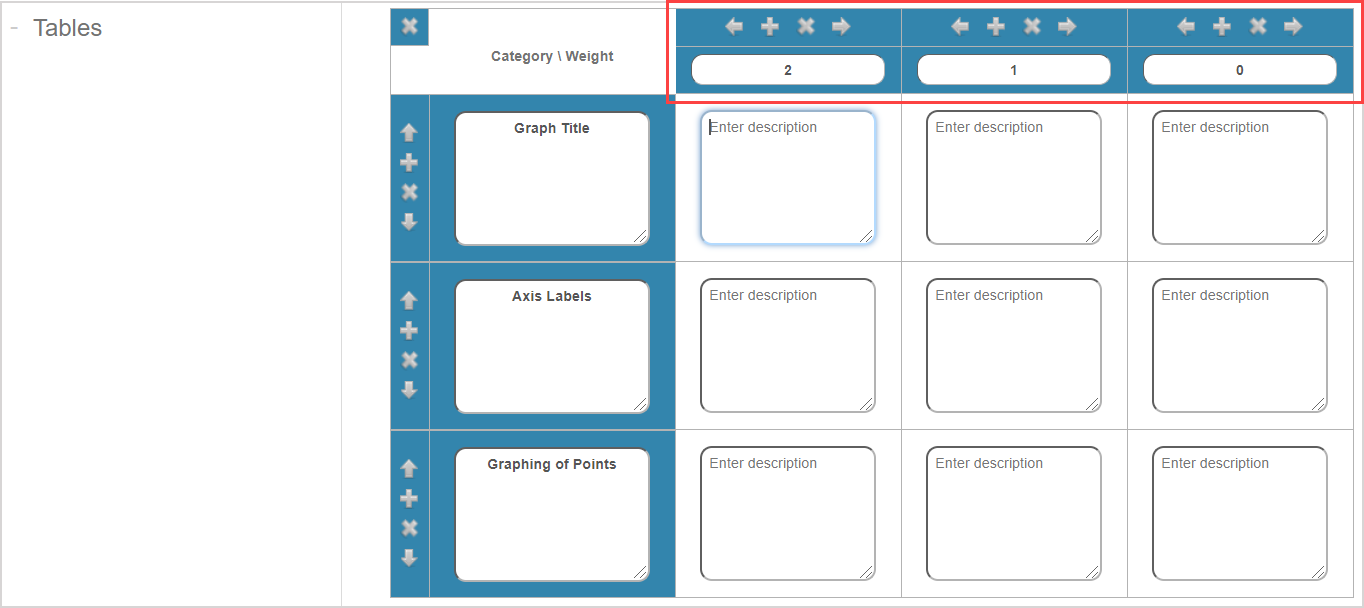
NOTE: Your entered weight values:
- Must be numerical
- Must be greater than 0
- Can be decimal values
NOTE: The sum of the maximum weight of each category in the rubric table defines the read-only total points for the external activity that it's applied to (Example — if a rubric has a maximum weight of 2 for each of its 3 categories, the total points achievable for the activity that it's applied to is 6 (2 x 3 = 6)).
NOTE: You'll receive an error message if you try to save your rubric table without defined weights. Click OK to escape the error message and define your new rubric table weights.

TIP: Use the rubric table controls to delete, add, and rearrange weights. Check out the Rubric table controls section of this help topic.
Define the descriptions of how each weight is assigned within each category.
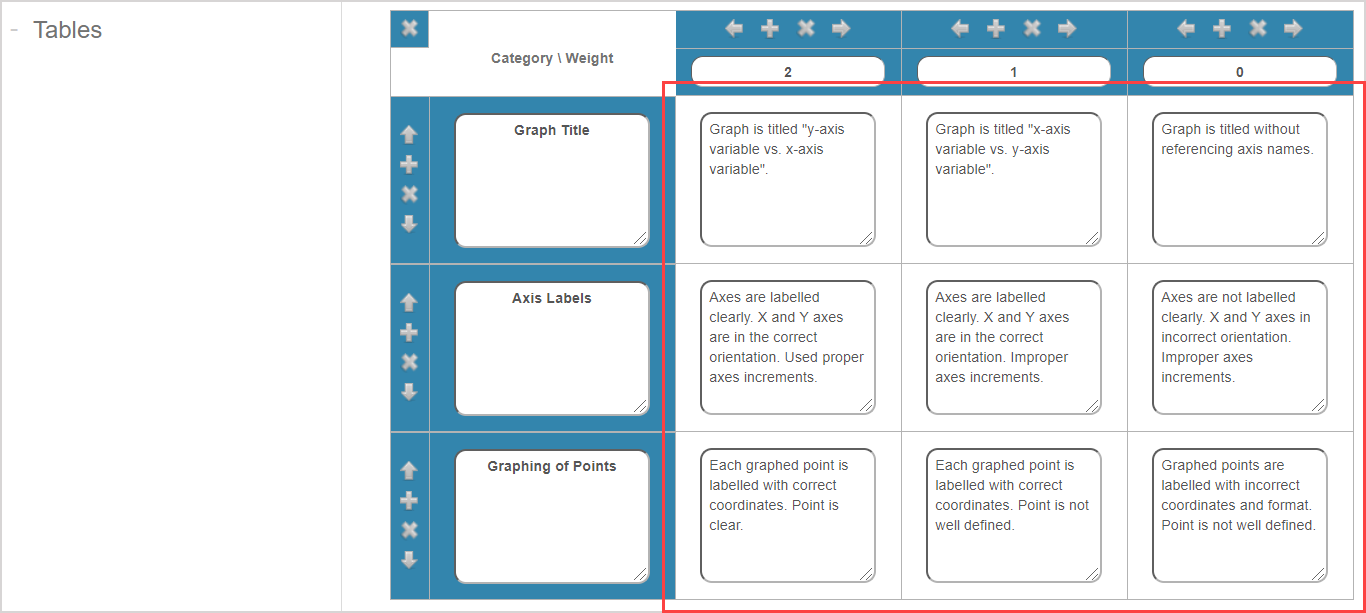
NOTE: You'll receive an error message if you try to save your rubric table without defined descriptions. Click OK to escape the error message and define your new rubric table descriptions.

TIP: Click Add Table if you want to add an additional rubric table.

IMPORTANT: Clicking Reset will erase all text entries from all tables as well as delete any additional tables that you've added. The title of the rubric table is maintained.

Click Save to save your new rubric table.
Your new rubric table is displayed as an available rubric table and is ready to be applied to an external activity (check out Apply a rubric table). The name, total points, and creation time stamp are visible.

NOTE: Child classes of the class that you used to create a rubric table will inherit the available rubric tables. If you create a rubric table in your parent class after the child class has already been created, the child class will still inherit the newly-created rubric table.
Rubric table controls
Use the following controls to edit your rubric table:
| Control | Description |
|---|---|
Delete icon:
NOTE: If the delete icon is clicked in the Category/Weight cell (upper left corner of the rubric table), the entire rubric table is deleted.
| |
Add icon:
| |
Move row up icon:
| |
Move row down icon:
| |
Move column left icon:
| |
Move column right icon:
| |
Resize icon:
|
